
Mecha Competition Build – Part 4: The Final Week
This is Part 4 of my Necrosknight competition build. If you haven't already, check out Mecha Competition Build – Part 3: From Battle-Damage to Battlefield
This is it, the final week before the competition deadline.
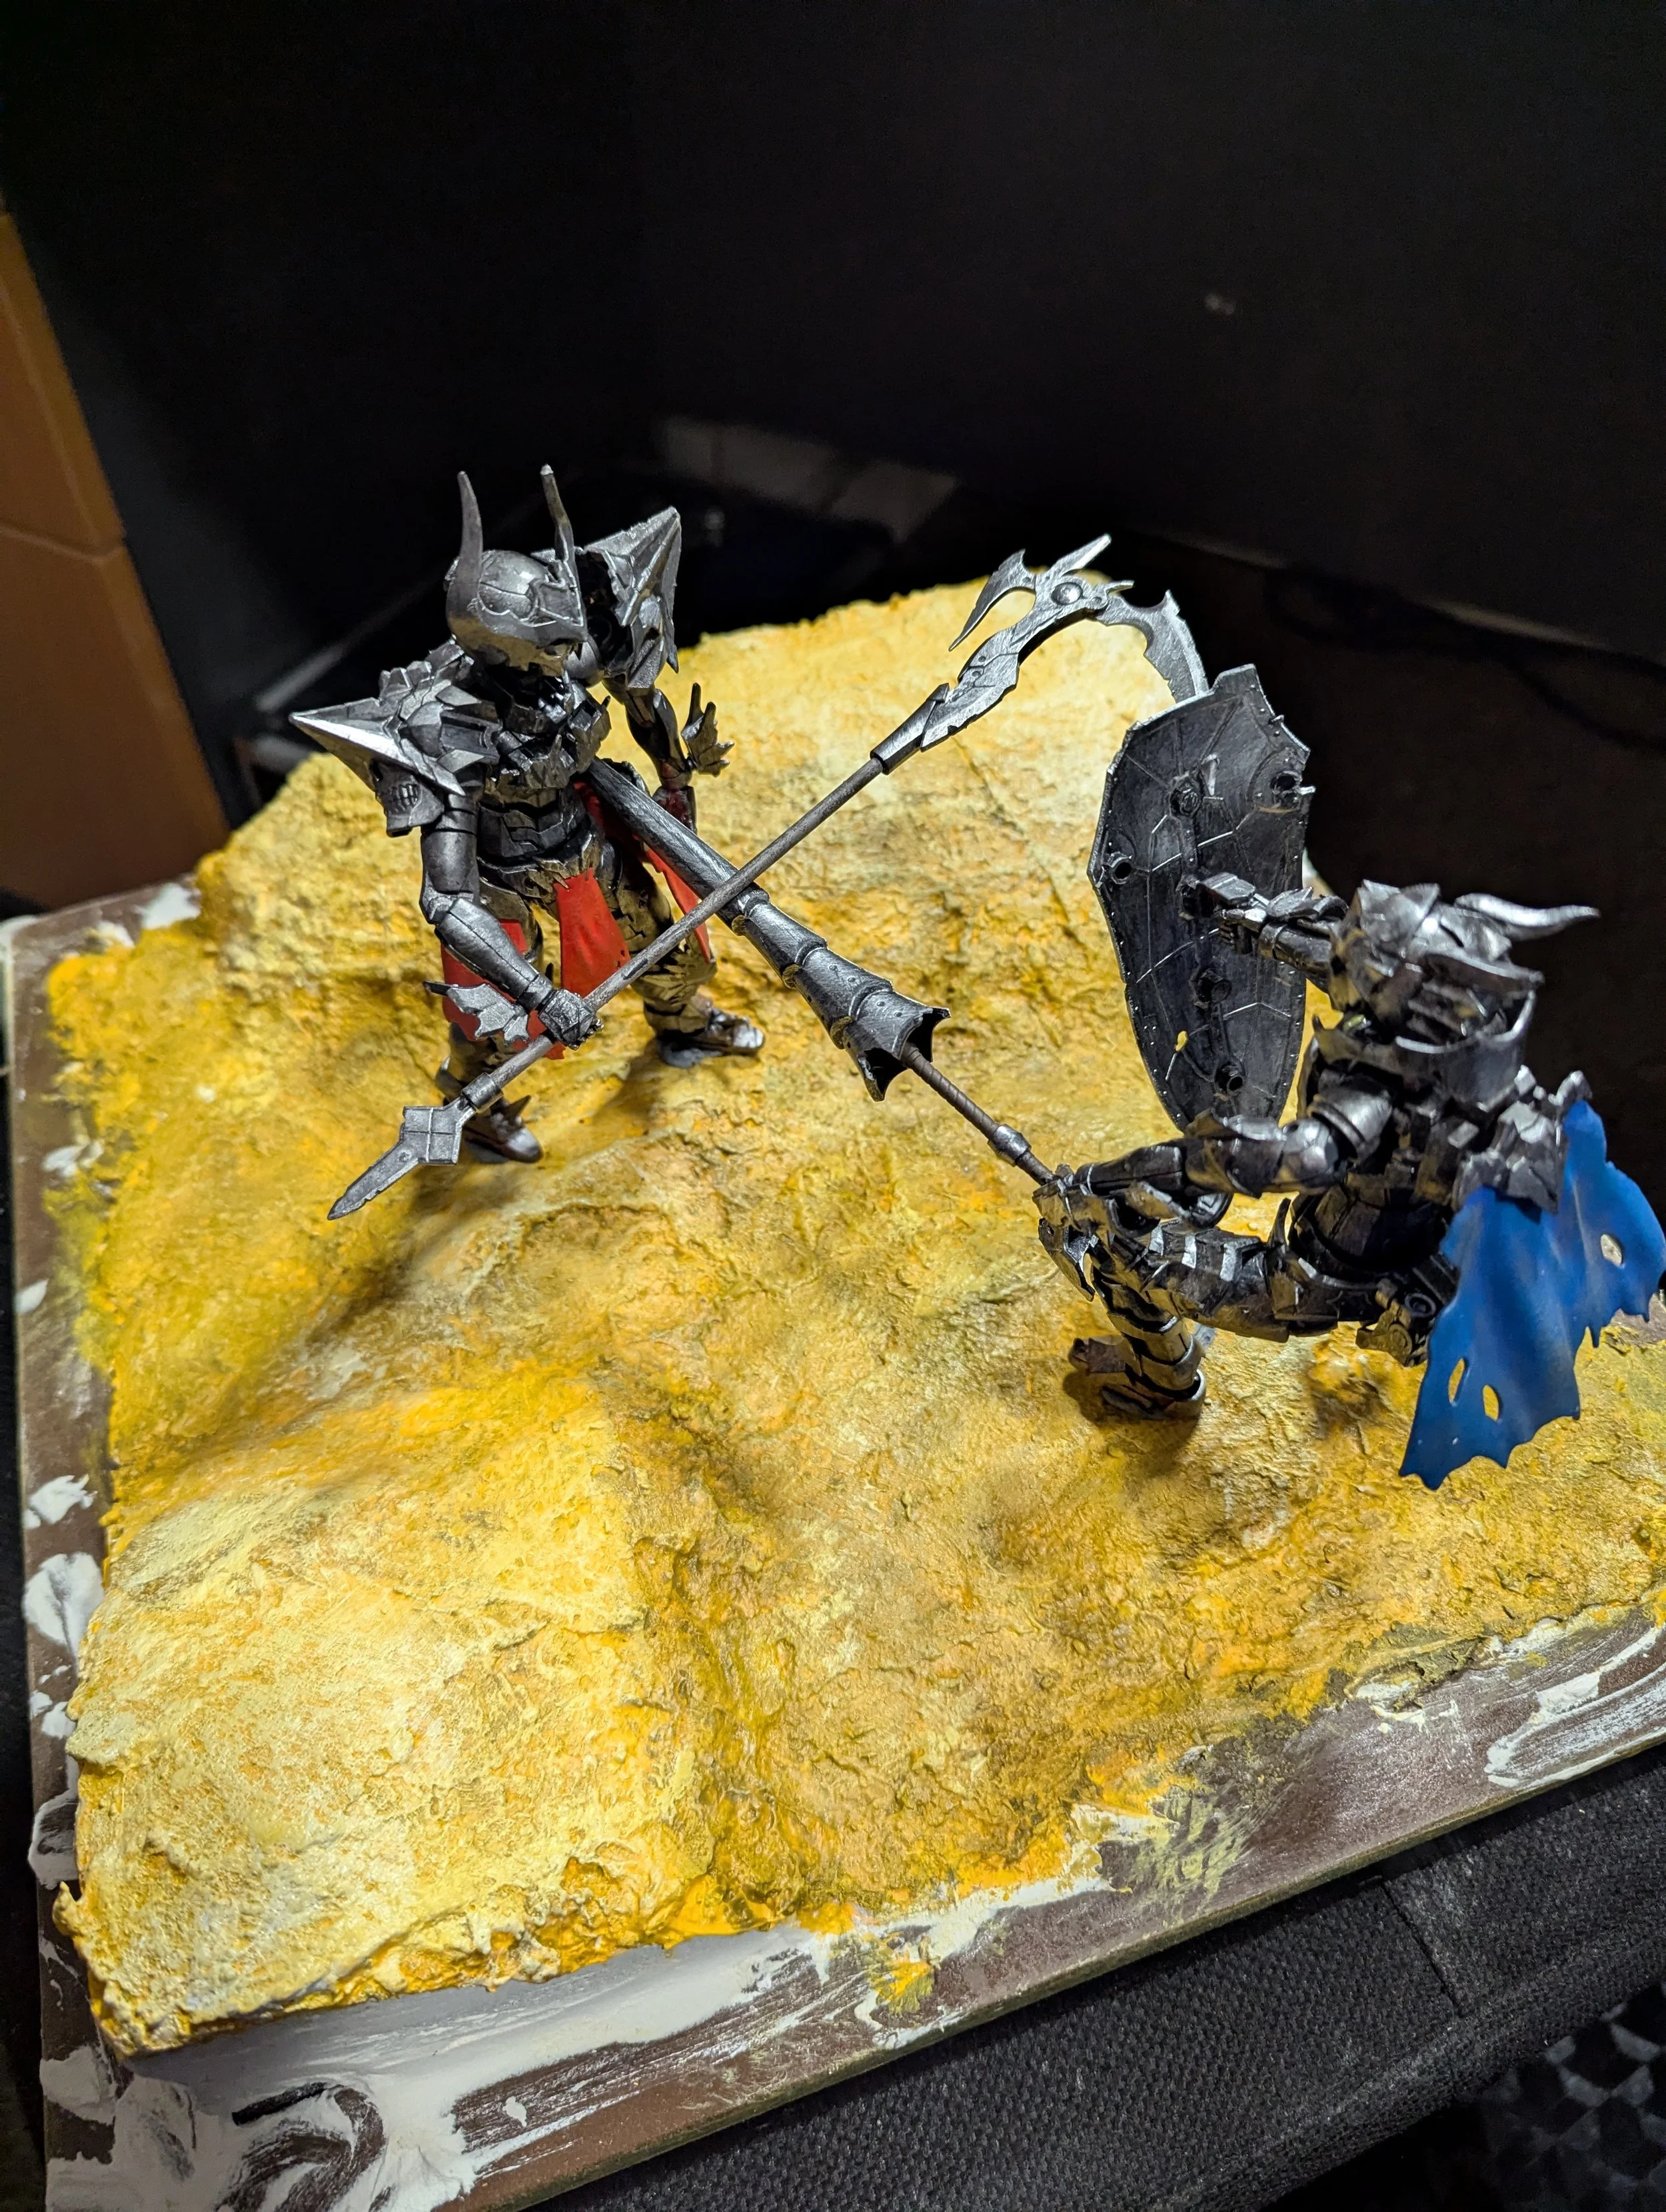
After weeks of building, painting, modifying and changing plans, the Necrosknight vs Rosan Lancer diorama is finally starting to come together. There are still a few things to finish, but at this point I'm very much in the final stages of the build.
The focus this week has been on the shield, the desert base and adding some atmosphere to the scene.
Finishing the Shield
The shield was one of the last major parts of the Rosan Lancer that needed to be completed.
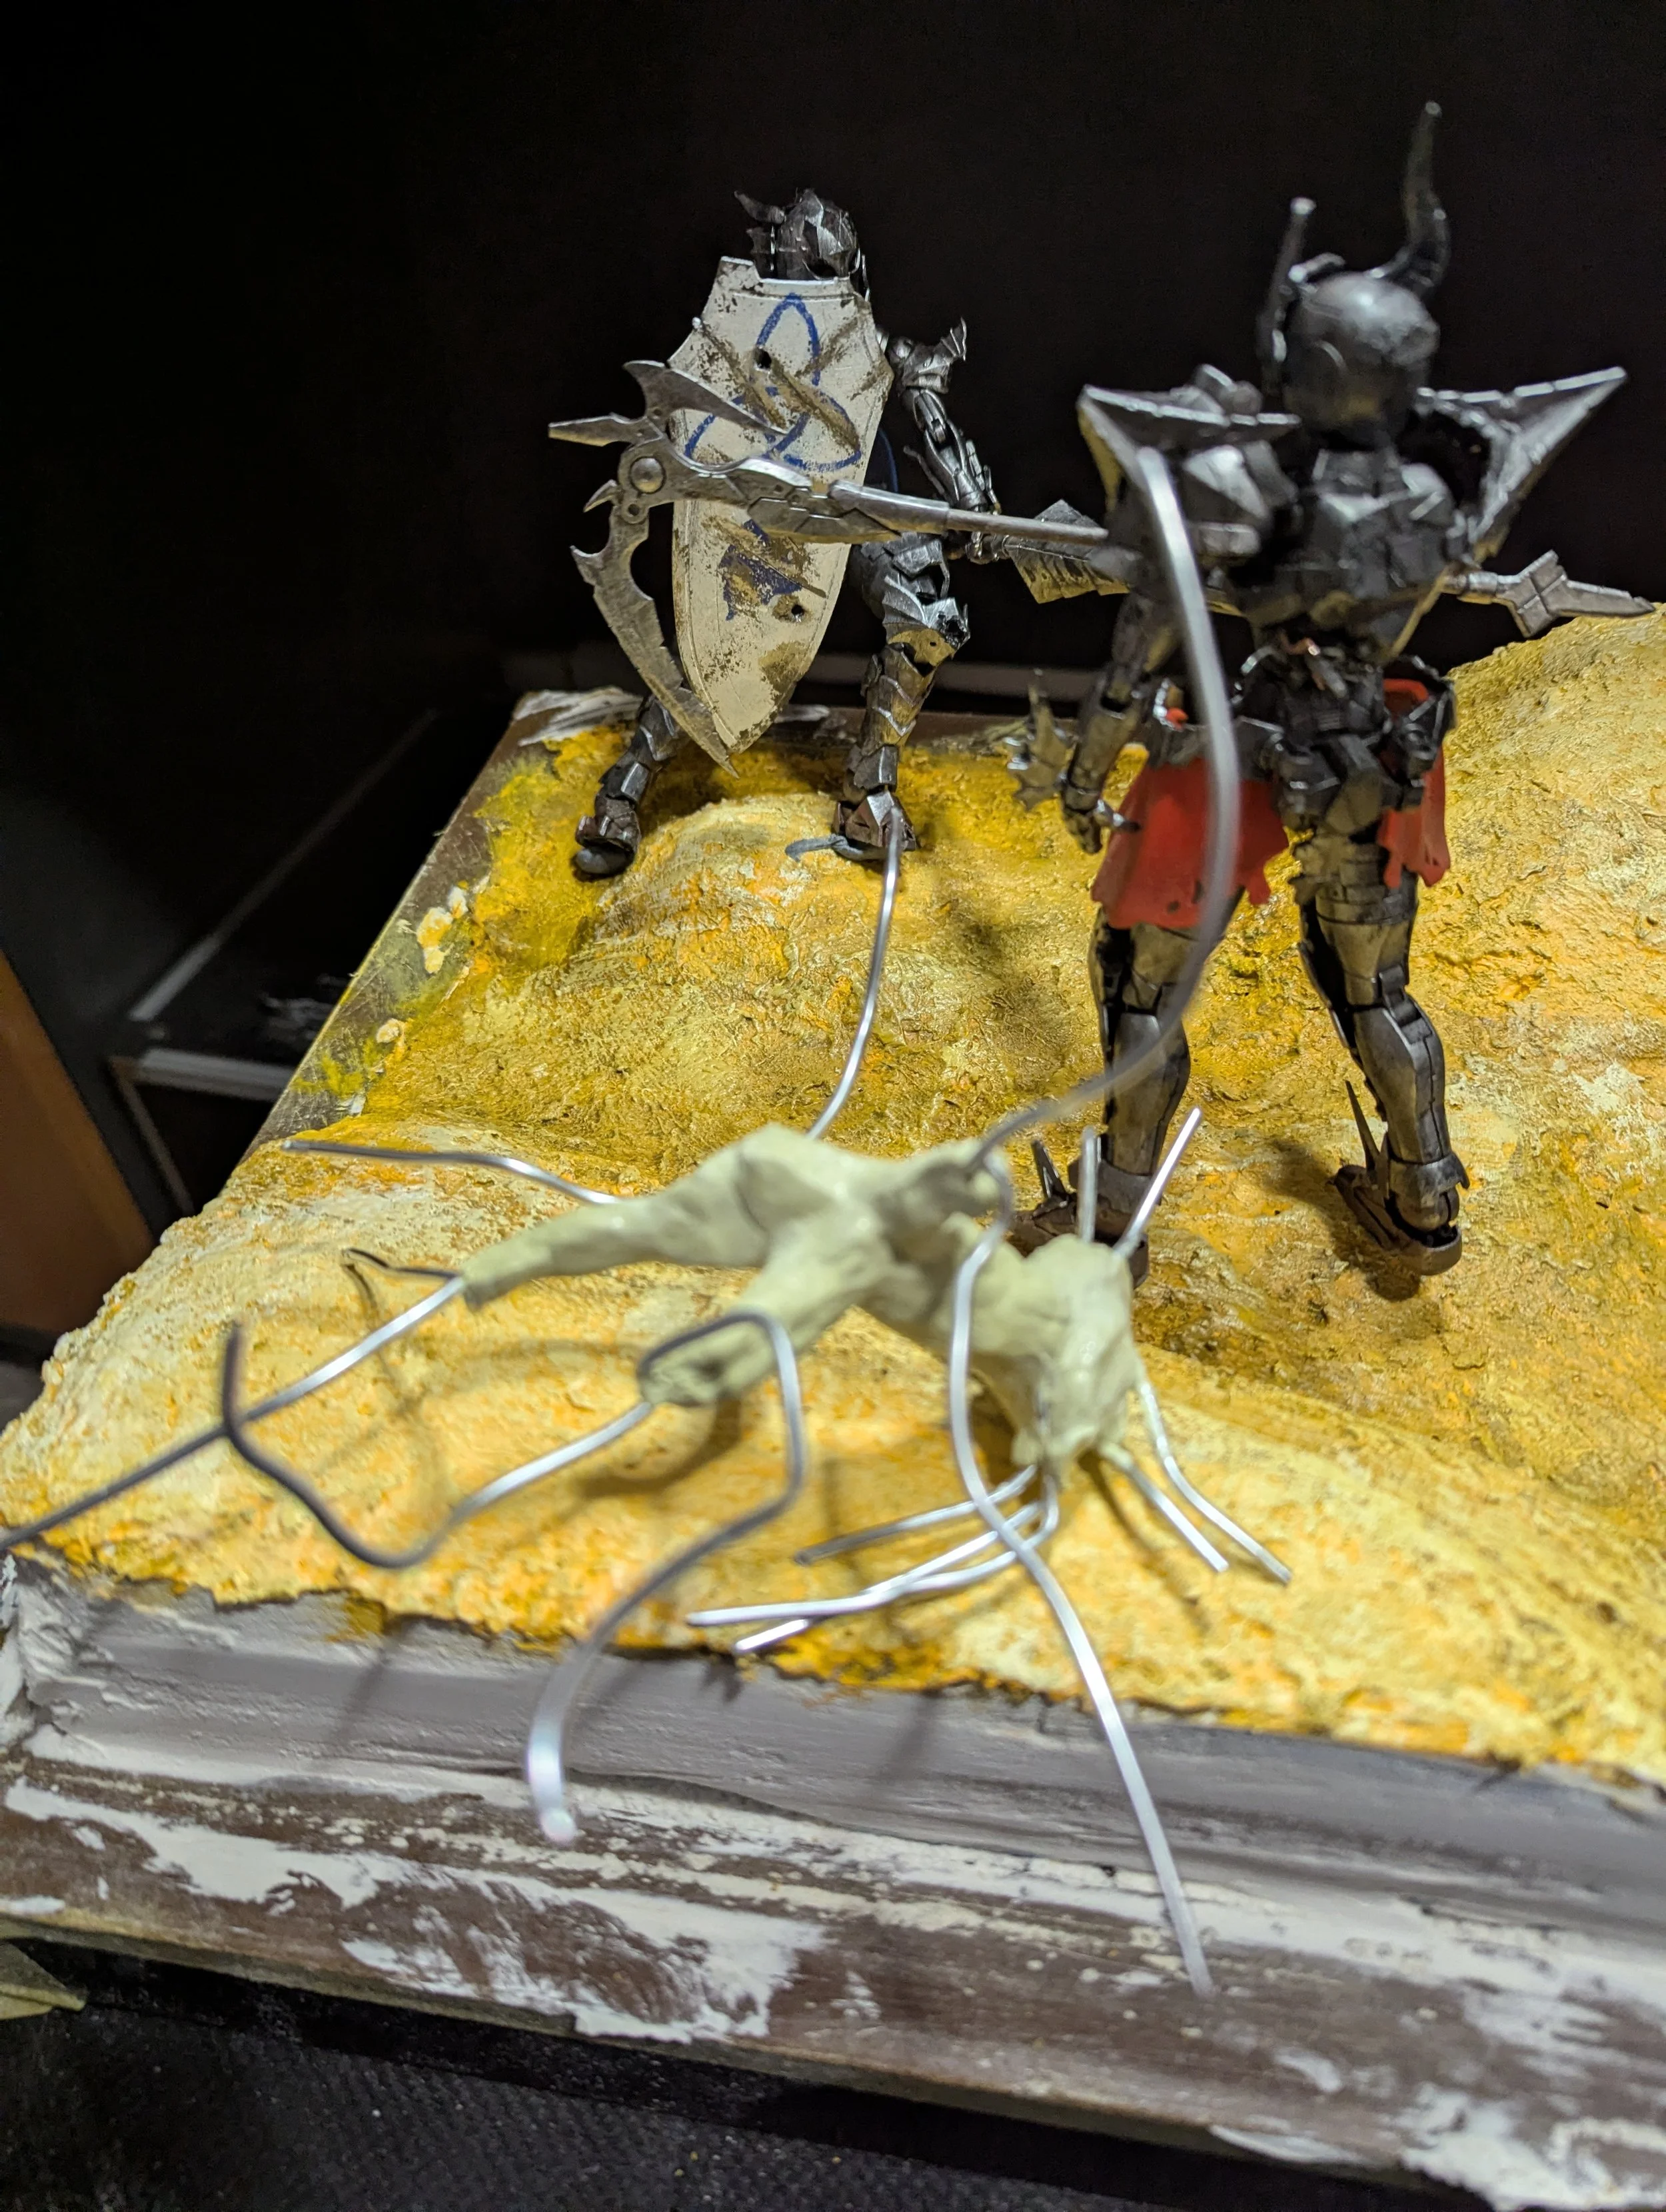
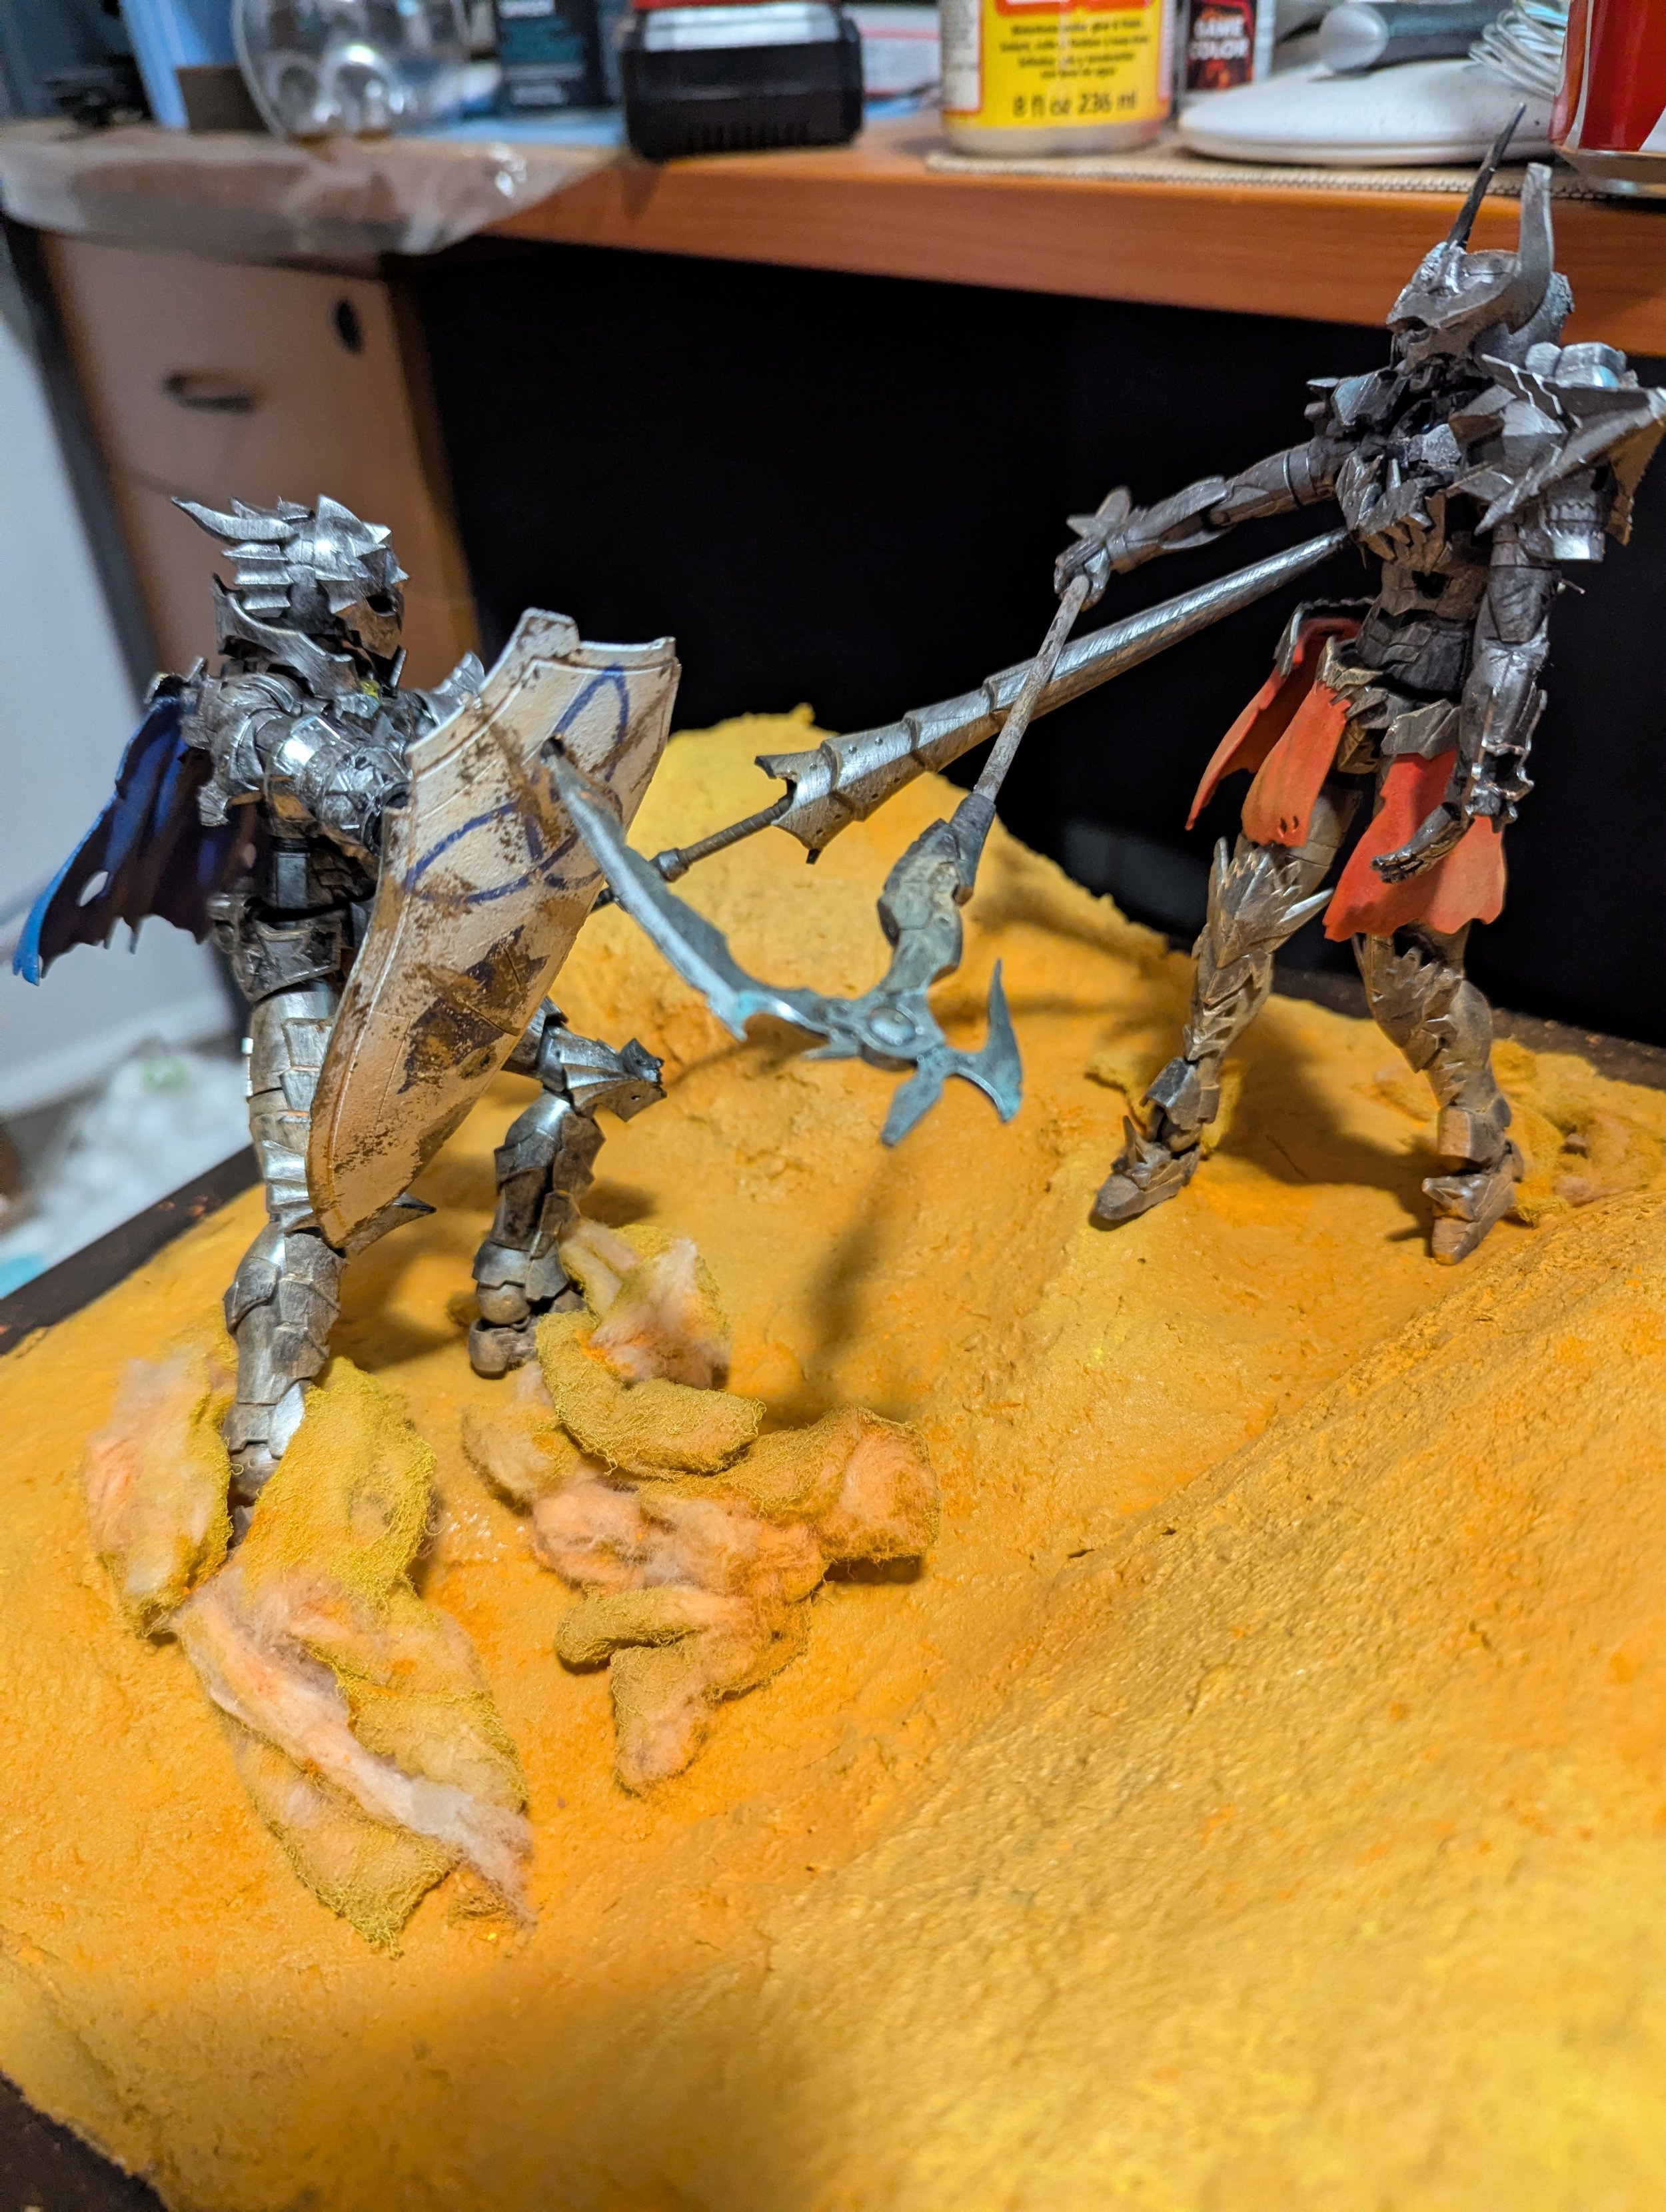
I wanted to add a design to the shield, but I didn't want it to look like a perfectly flat decal. I used my Cricut to create some stencils for the design and then sponged the paint through them.
Sponging the paint rather than applying it evenly gave the design a slight texture and some variation. It isn't completely uniform, but I actually think that works better for this build. It makes the marking feel more like something that has been painted onto the shield rather than something that was produced perfectly clean.
Once the design was finished, I went back in with the damage.
I cut and chipped sections of the shield to match the rest of the battle damage across the mechs. With the Necrosknight's scythe embedded into the shield, I wanted the damage to feel like it belonged to the action happening in the scene.
This is one of those details that probably wouldn't stand out on its own, but it helps everything feel more consistent when the whole diorama is viewed together.
Building the Desert
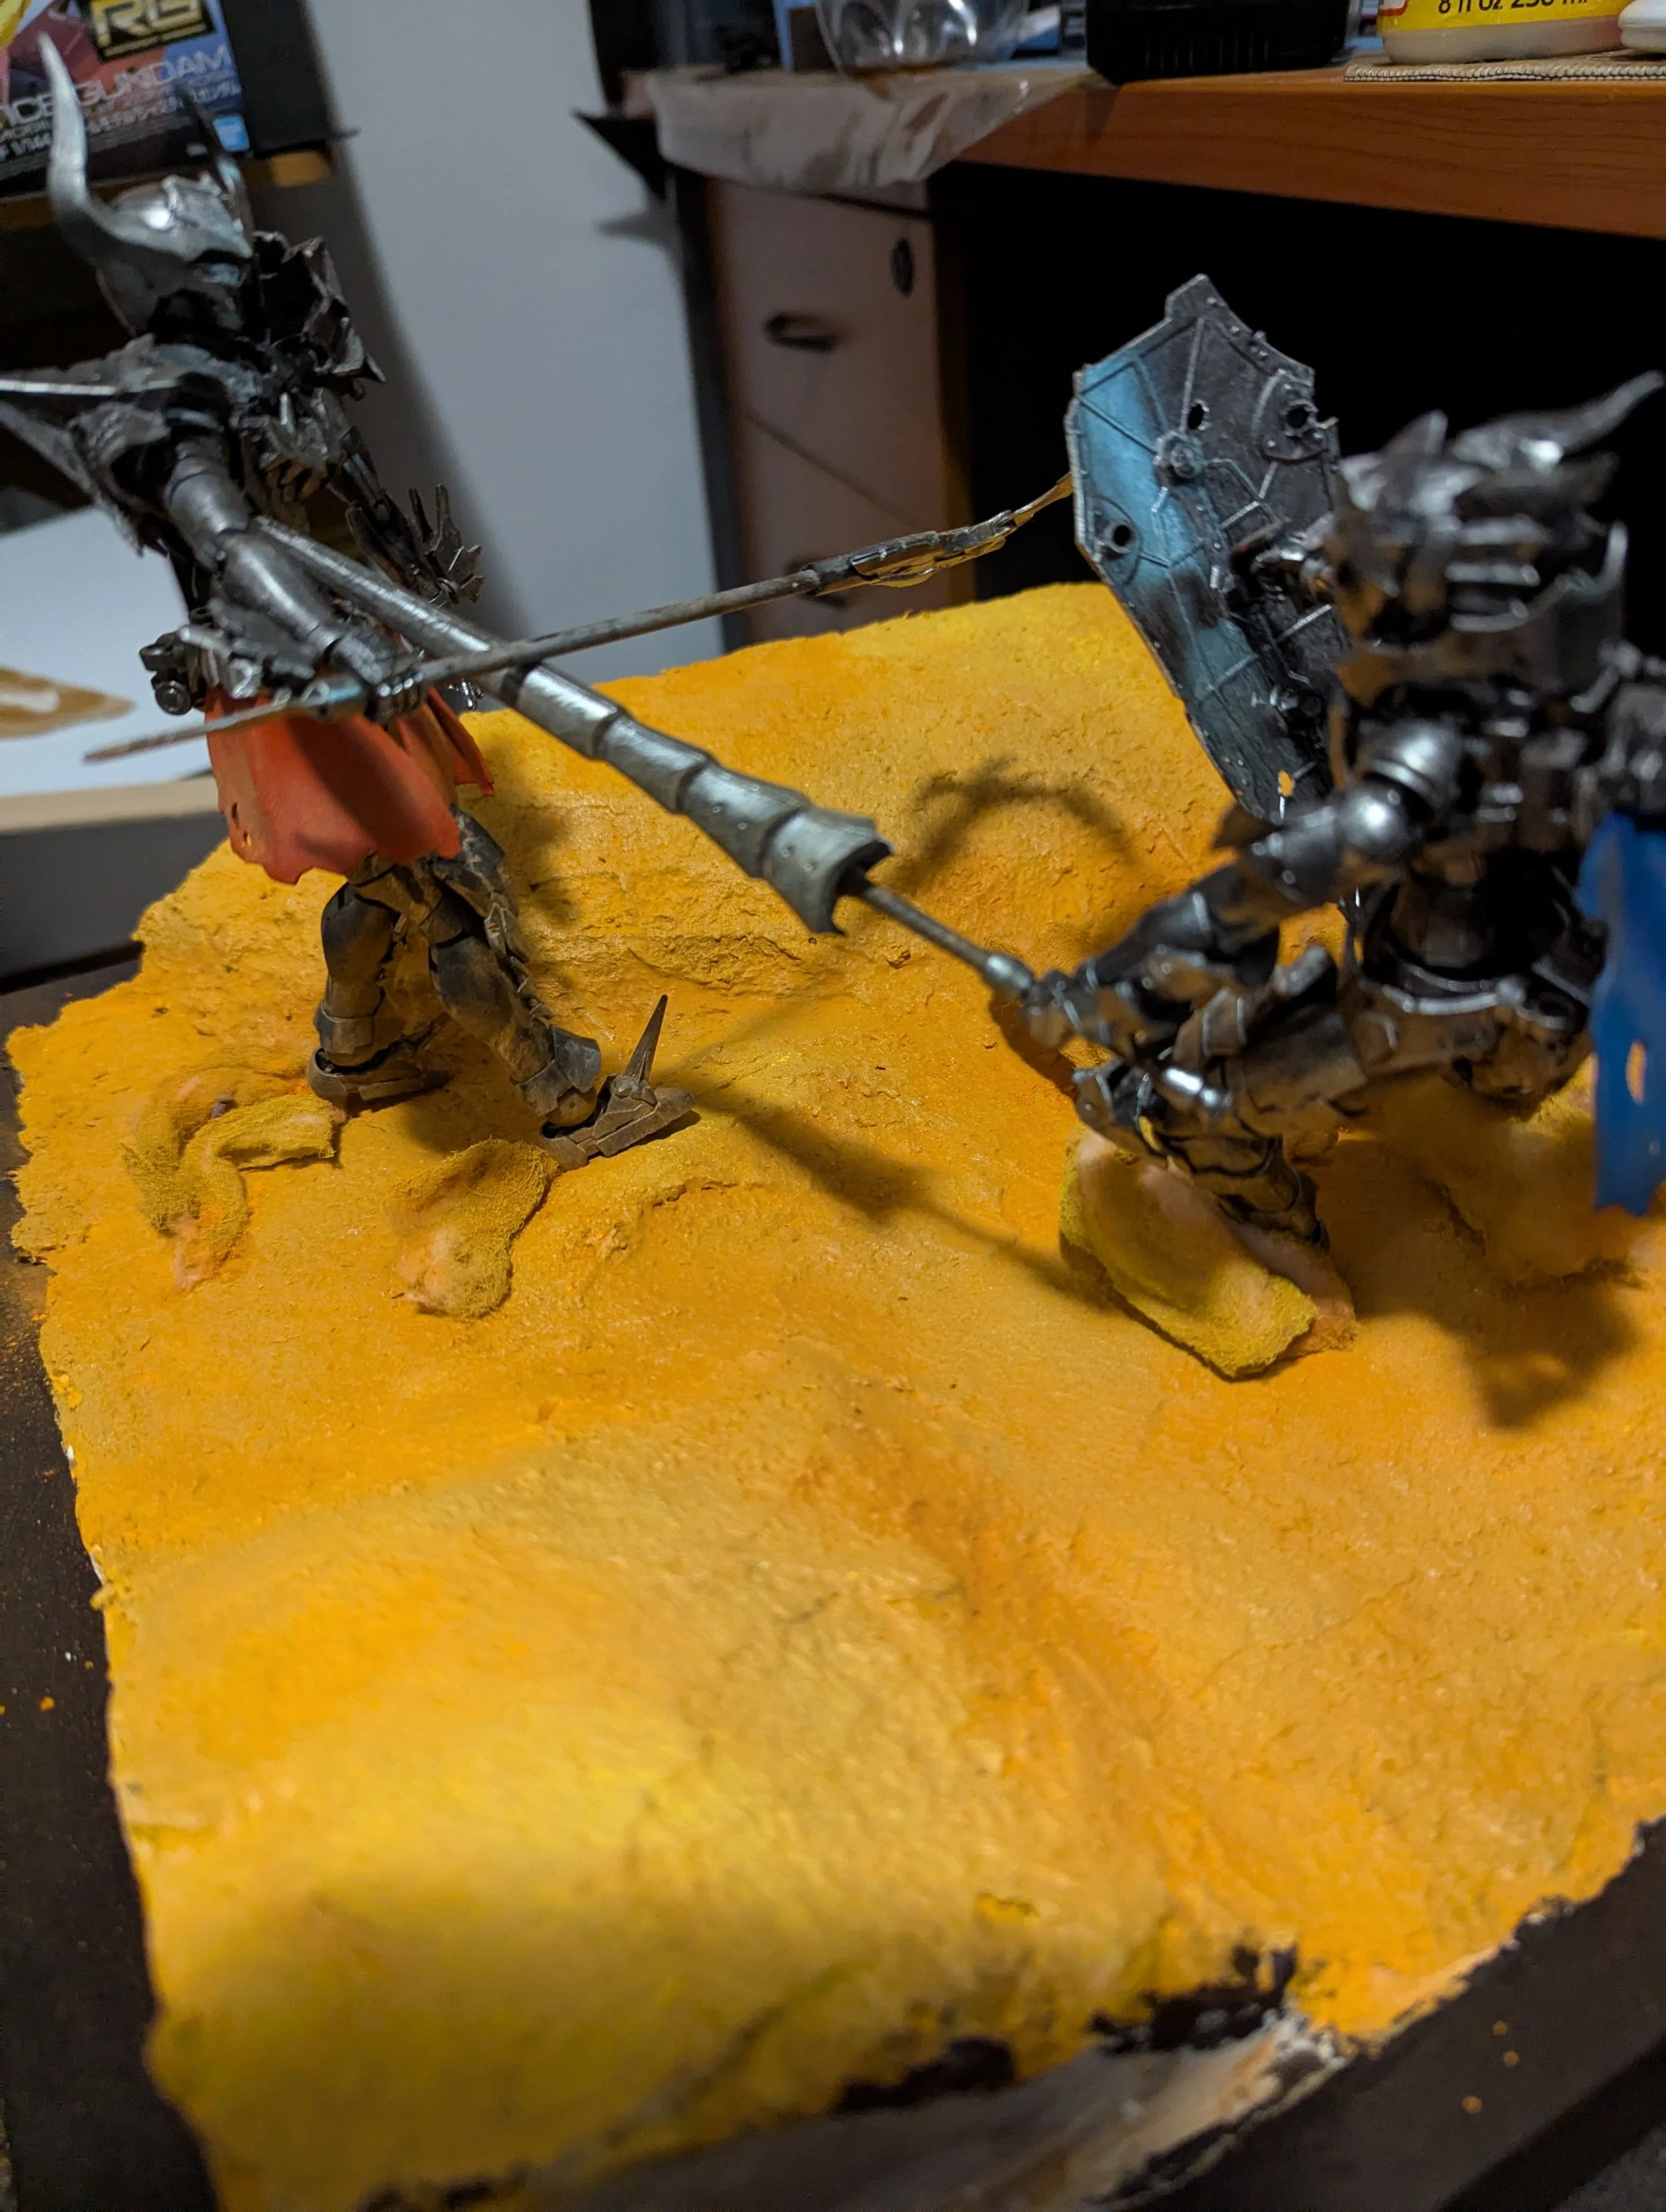
The next job was getting the base looking like a desert.
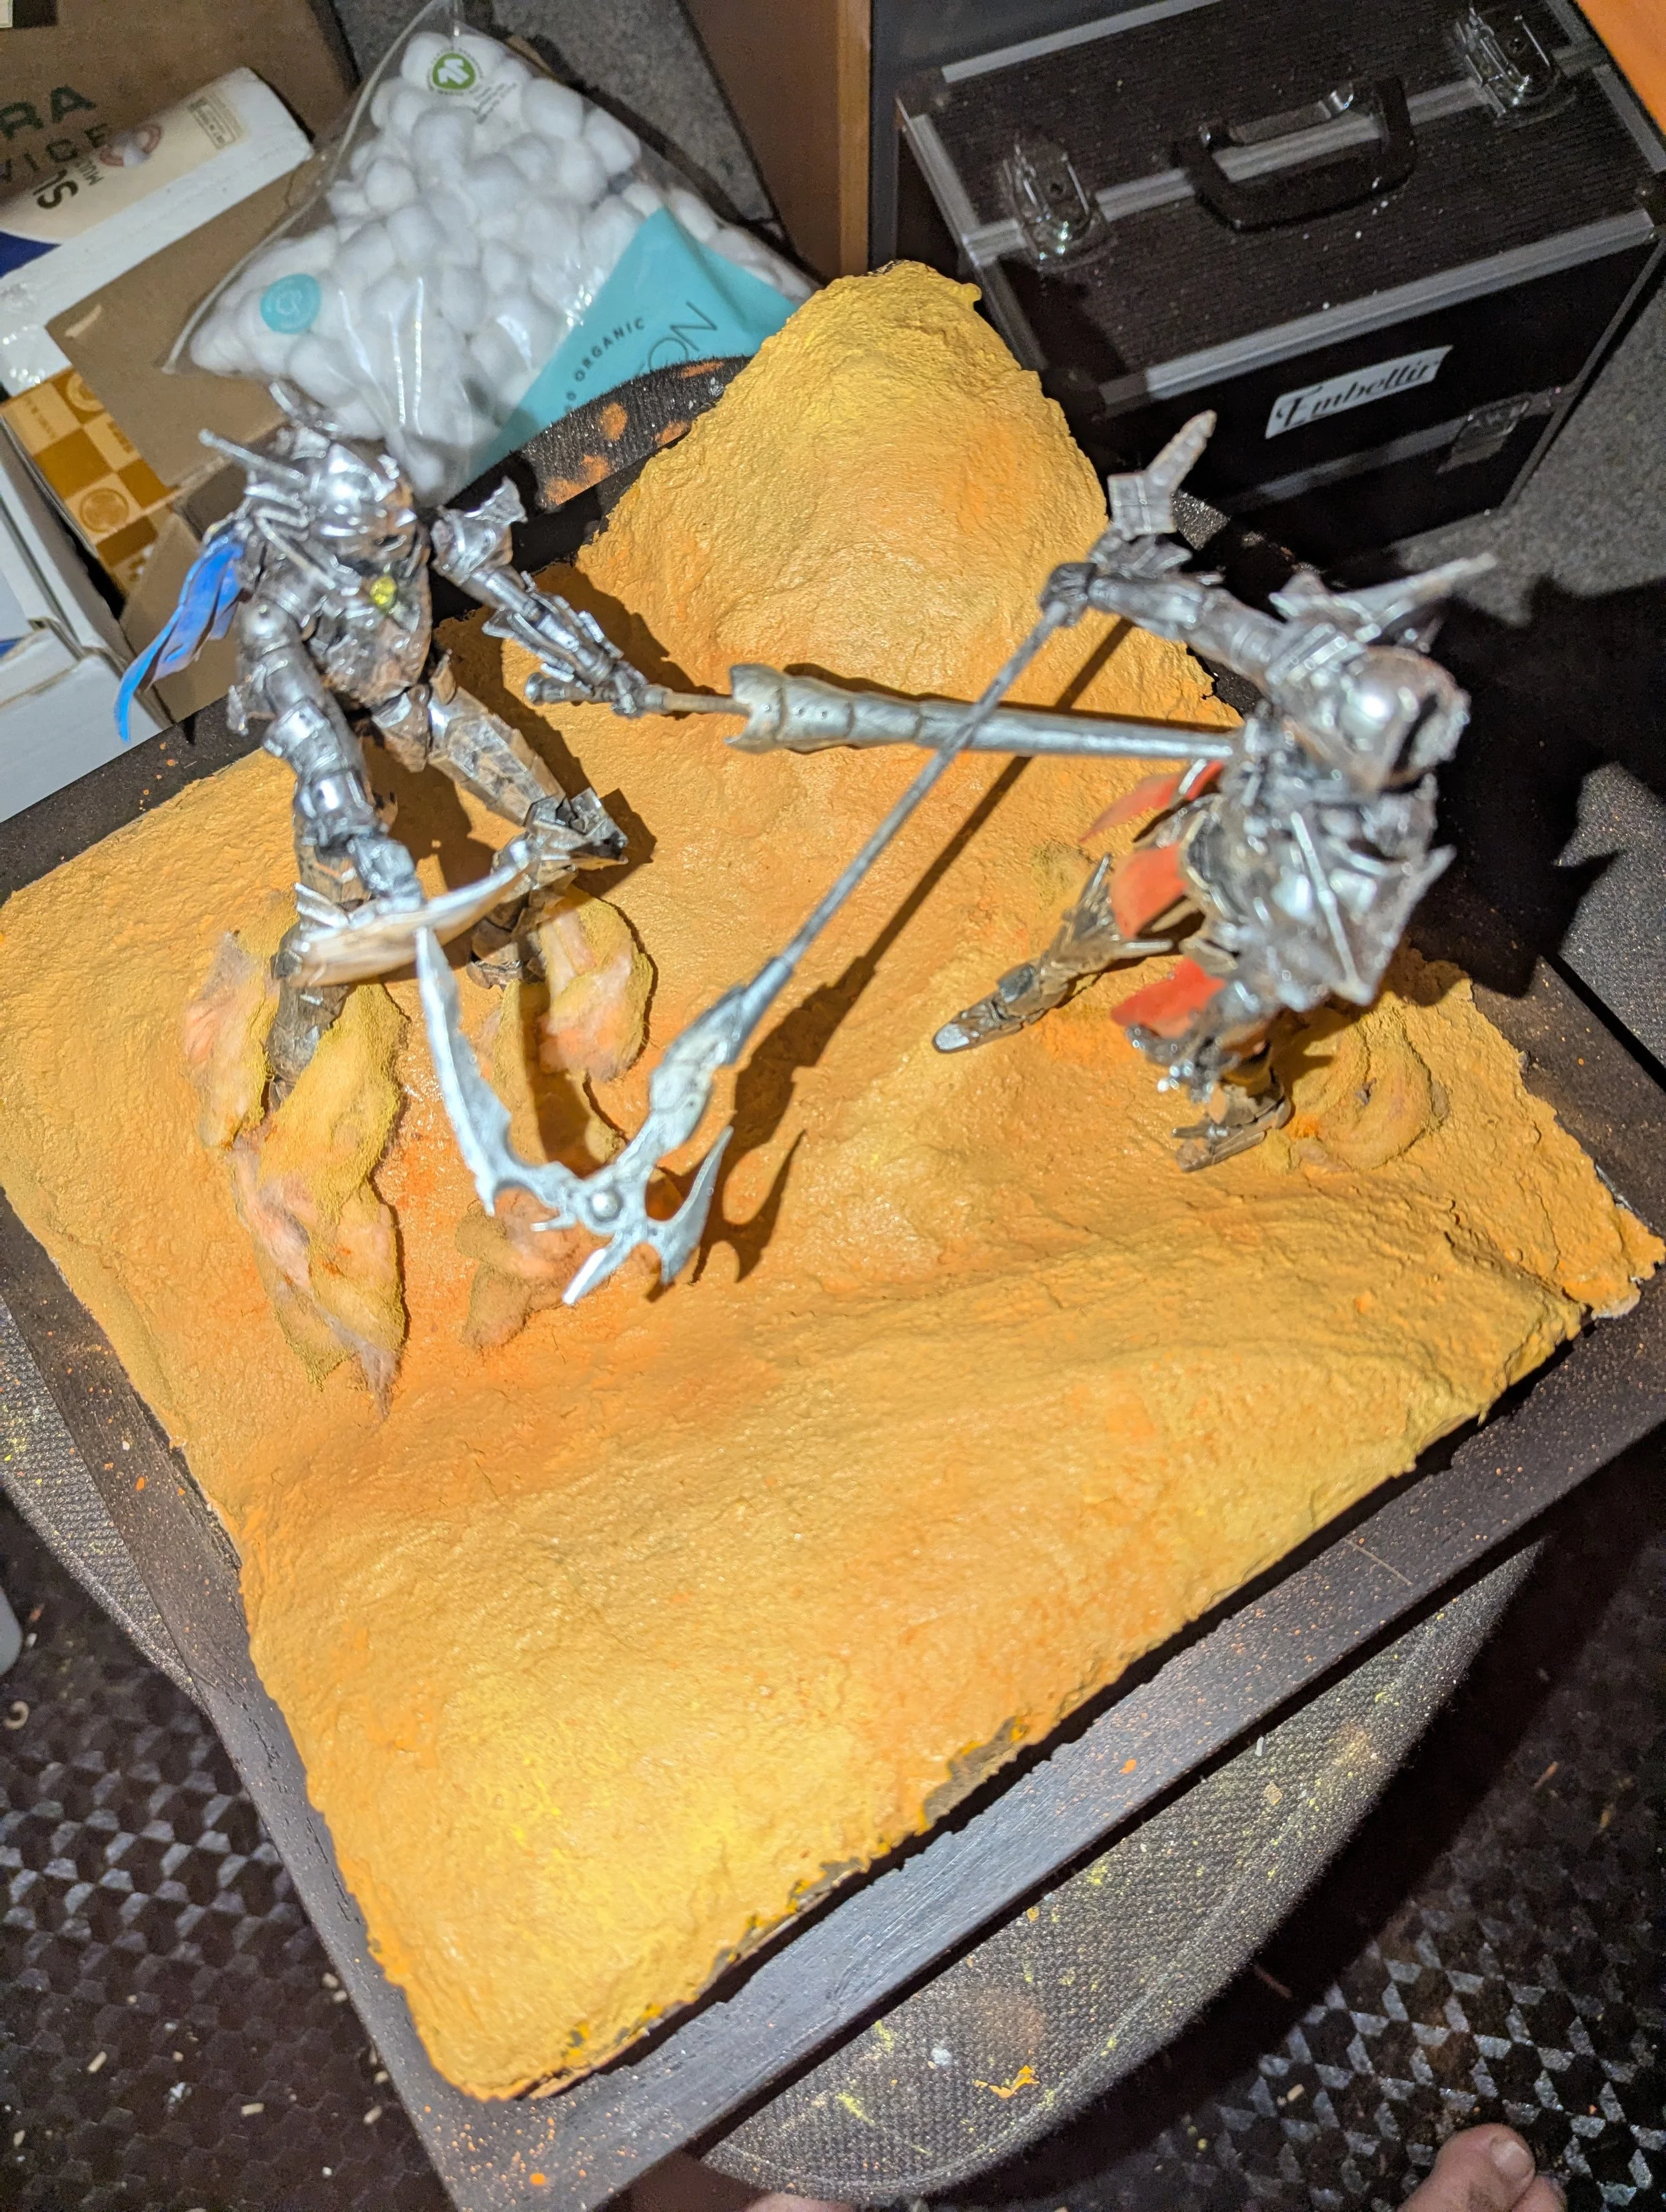
I used texture paste across the surface to give the ground a rougher, more uneven texture. I wanted to avoid having the mechs sitting on a perfectly smooth base and instead create something that looked dry and dusty.
I then sanded it down once it dried to create a more sand like texture rather than rock or dirt.
I started by painting the desert yellow.
It quickly became obvious that it was far too bright.
I followed up by using orange to tone the colour down. This dulled the yellow and gave the ground a warmer, more dusty appearance that worked much better with the colours of the mechs.
It was a good reminder that the environment is never a single colour and has variation in shade and also a mixture of colours all together.
Making My Own Dust Pigments
I wanted to push the dusty appearance of the desert even further, so I picked up some pastels.
Rather than buying dedicated pigment powders, which I have had sucess with in the past, I experimented with scraping soft pastel sticks down to create my own powder.
It worked surprisingly well, and a single stick appears to go a long way.
The resulting powder could be worked into the textured ground to create a much more natural dusty appearance. It also turned out to be considerably cheaper than buying dedicated pigment powders, which makes it a technique I'll likely use again in future projects.
I think I may even spend some time and grind them all up and store them as a poweder for instant use. This will also minimise the one dounside, the mess.
Creating the Dust Clouds
I also wanted to add some dust clouds to the scene to create the precesence of motion.
For these, I used cotton wool. I pulled the cotton wool apart to make it less dense and give it a more irregular shape before painting it with a spray can. I used the same colours as I used on the ground.
I then layered the cotton wool to give the clouds some additional depth.
I'm pretty happy with how they turned out, although this was definitely one of those jobs where I found myself thinking that an airbrush would have made things considerably easier.
Finally I added some of the pigment powder to have it match the scene.
Being able to gradually build up the colour with an airbrush would have been faster, given me more control and probably produced a better result.
It's definitely making me think that investing in an airbrush might be worthwhile for future projects, especially large ones.
The Tree That Didn't Make the Cut
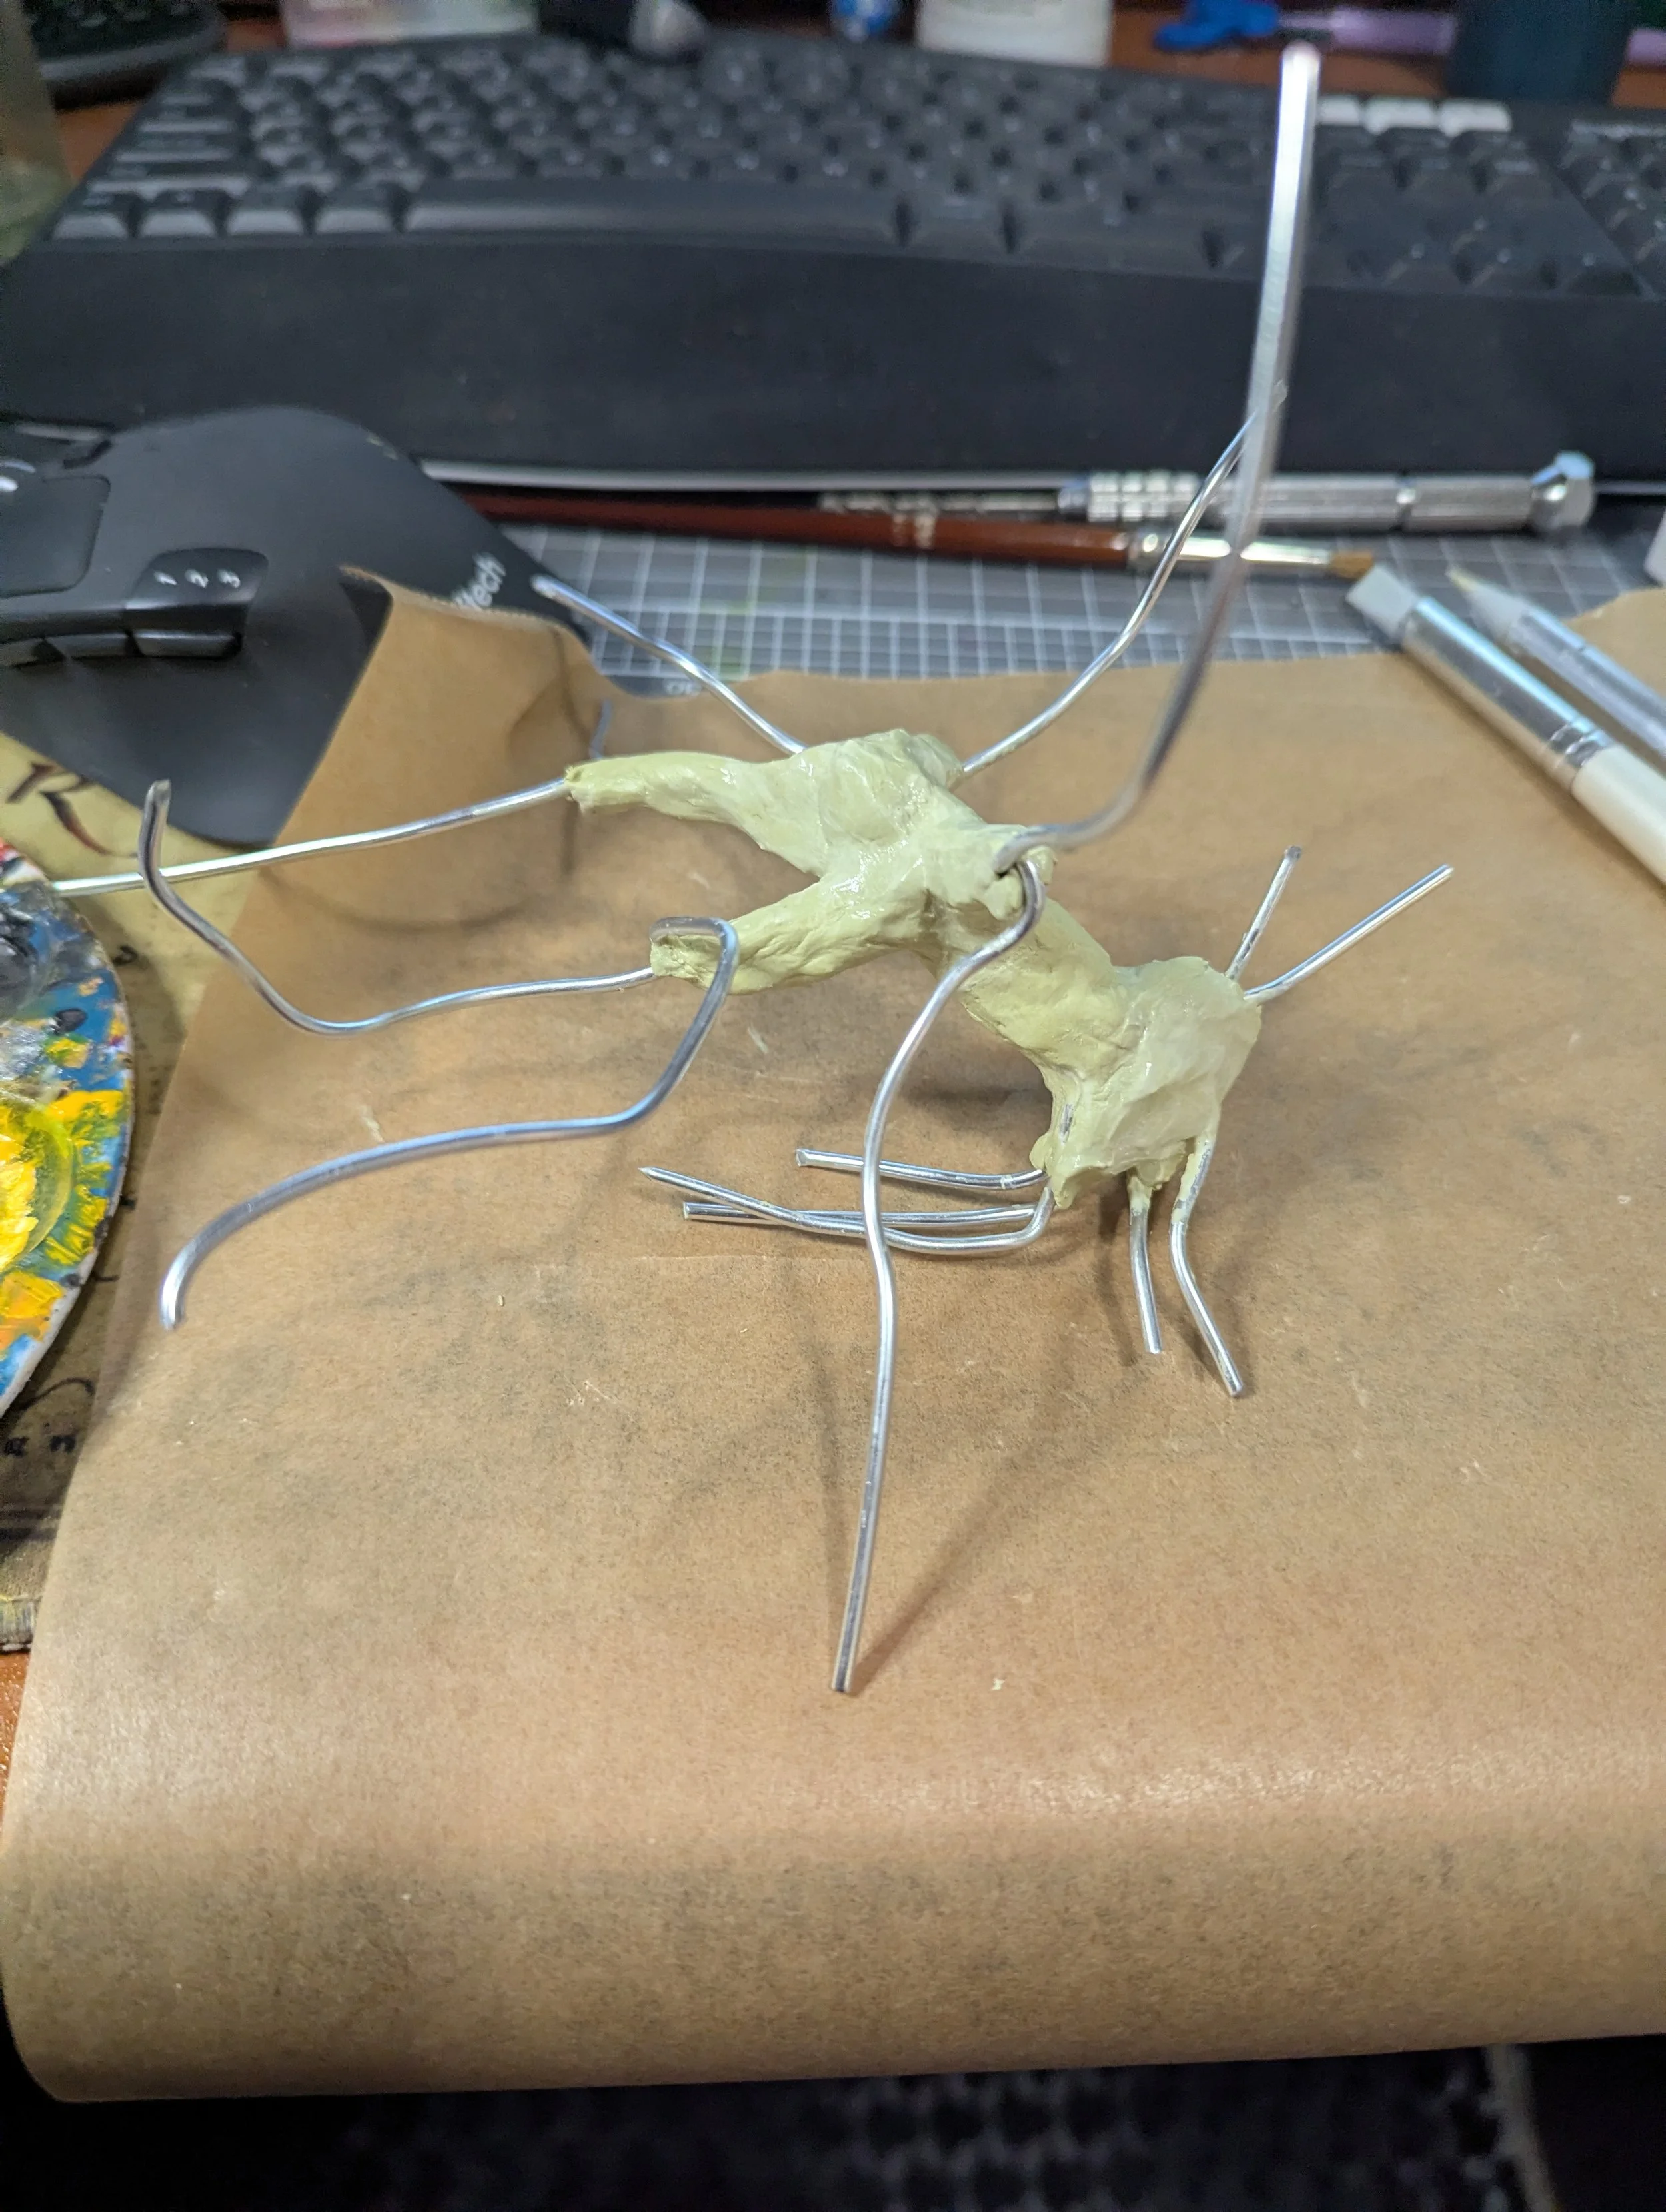
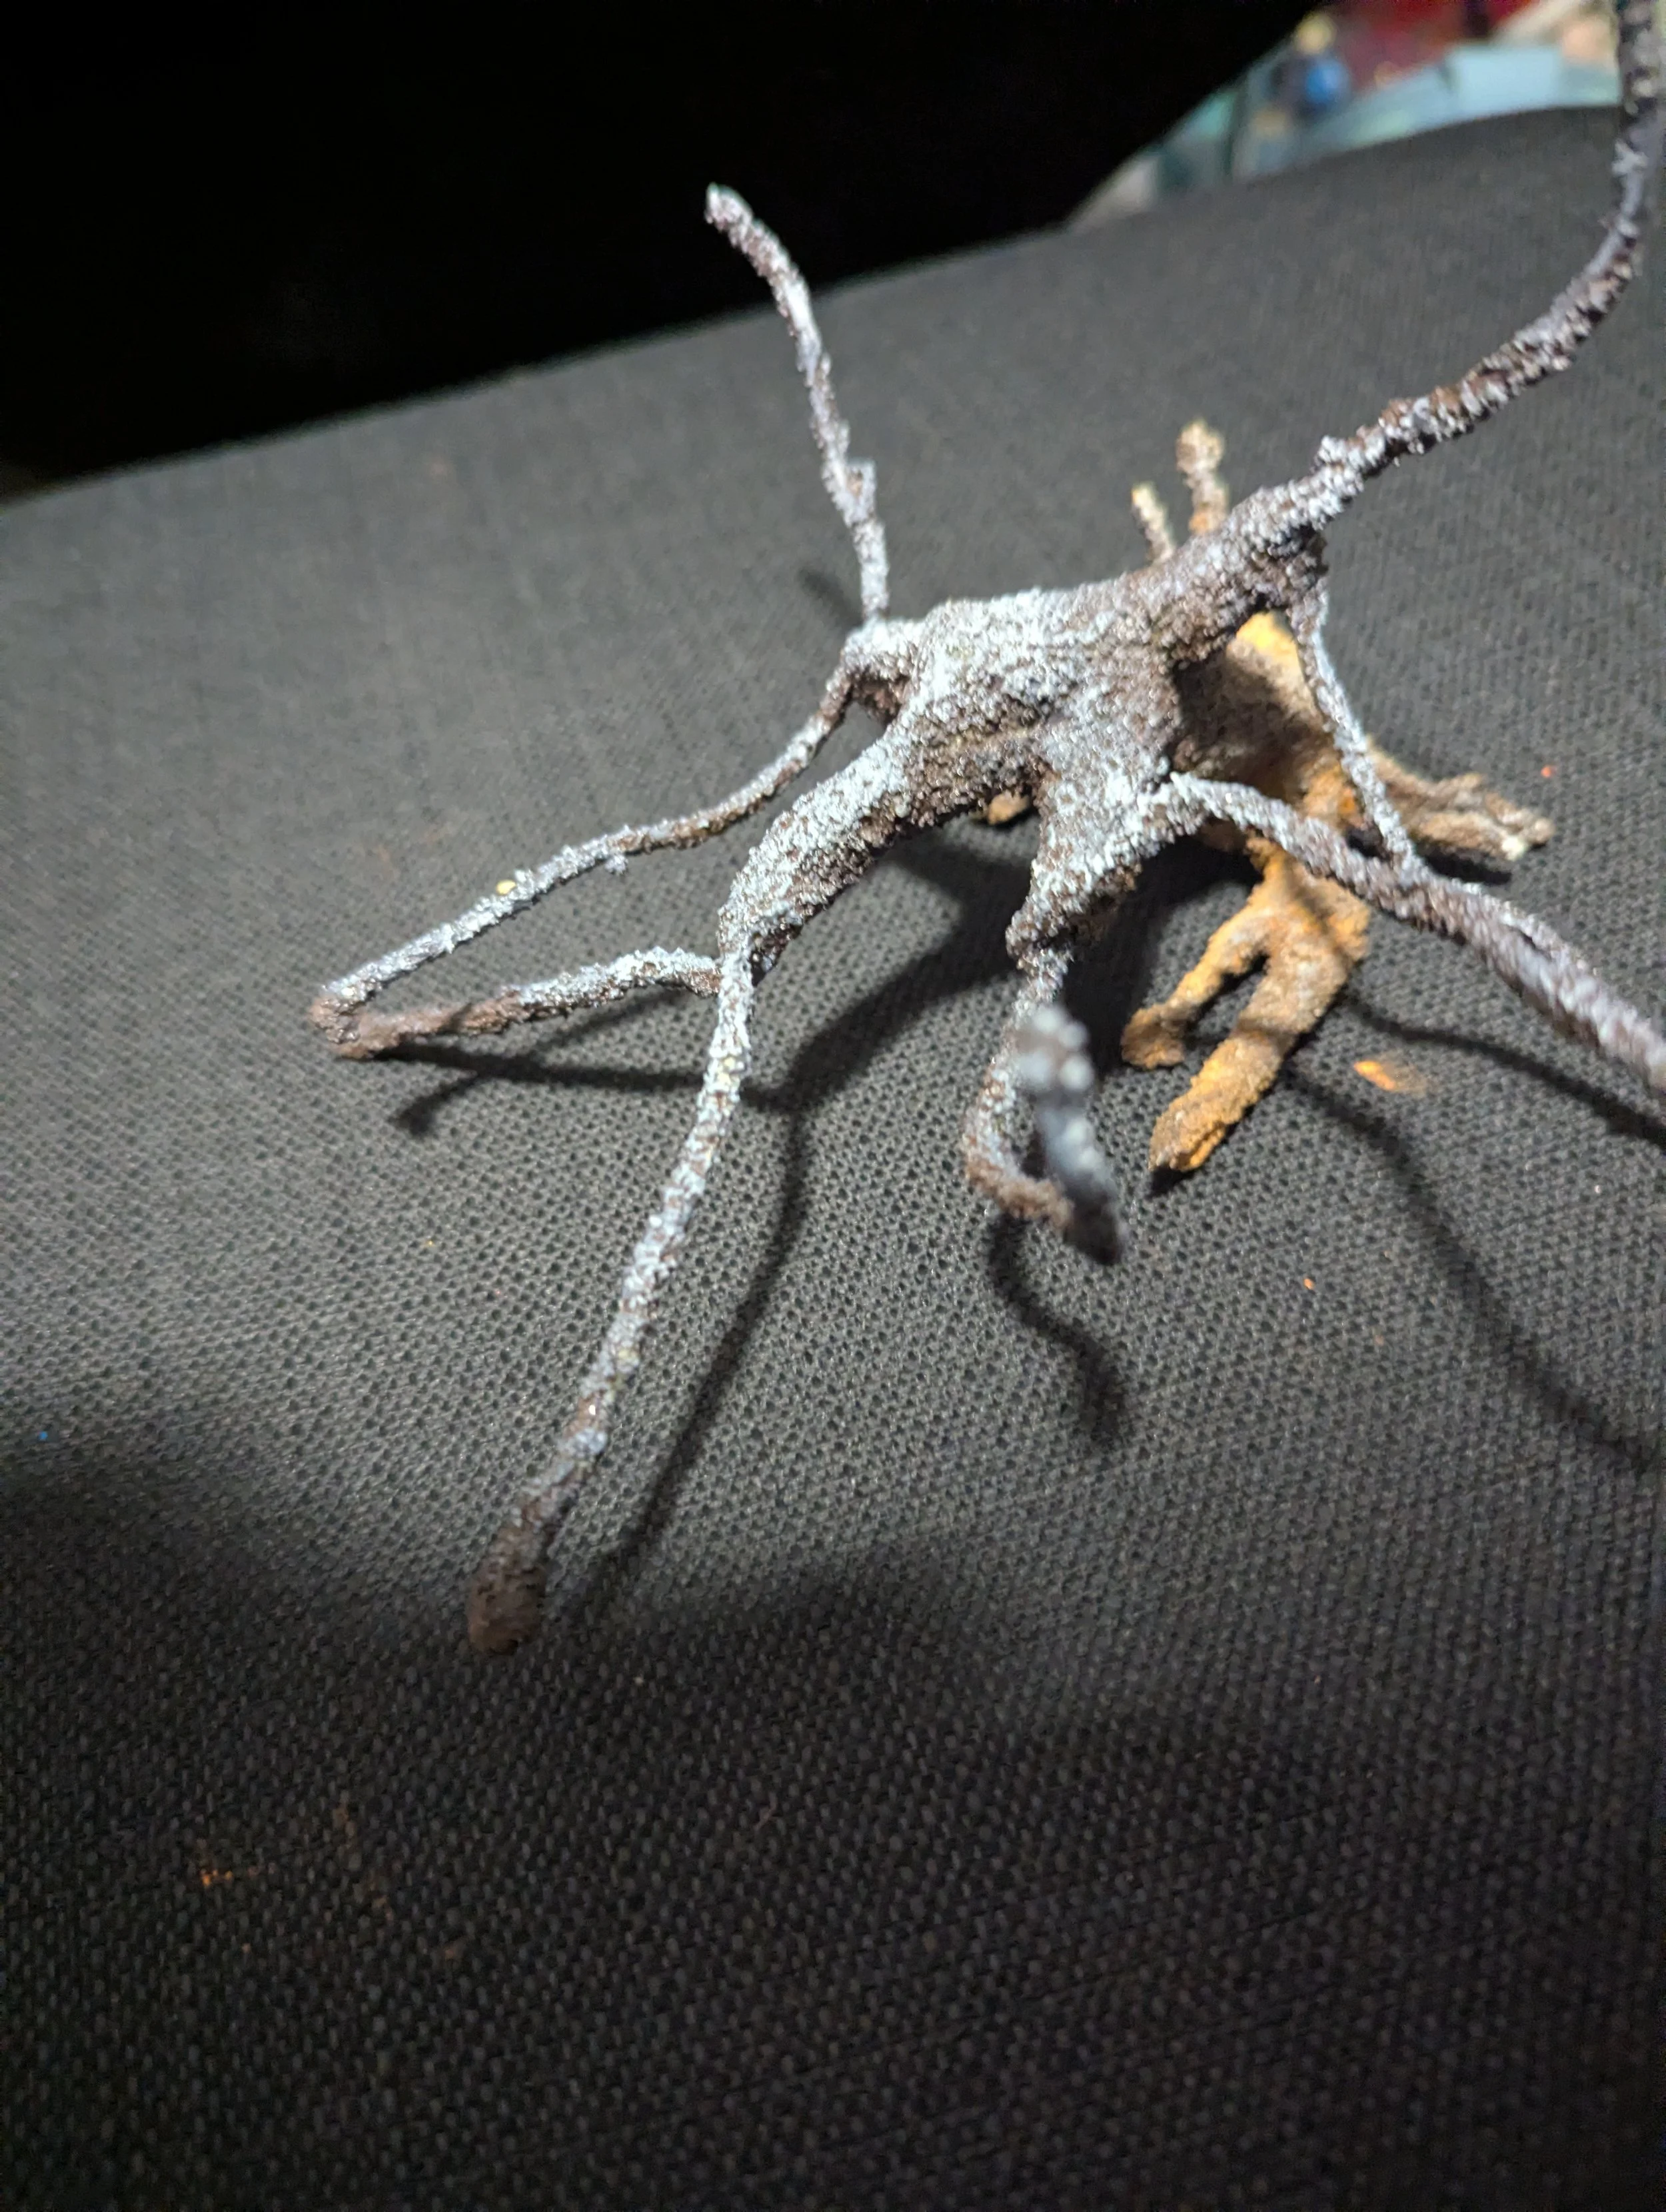
I also built a tree for the diorama using armature wire and Milliput.
I shaped the armature wire into the basic structure before building up the tree with Milliput. Once the shape was finished, I textured it with some fine sand to create a course bark texture and painted it to fit the dry desert environment.
It was another element that I thought would help make the base feel more alive, ironic for a dead tree.
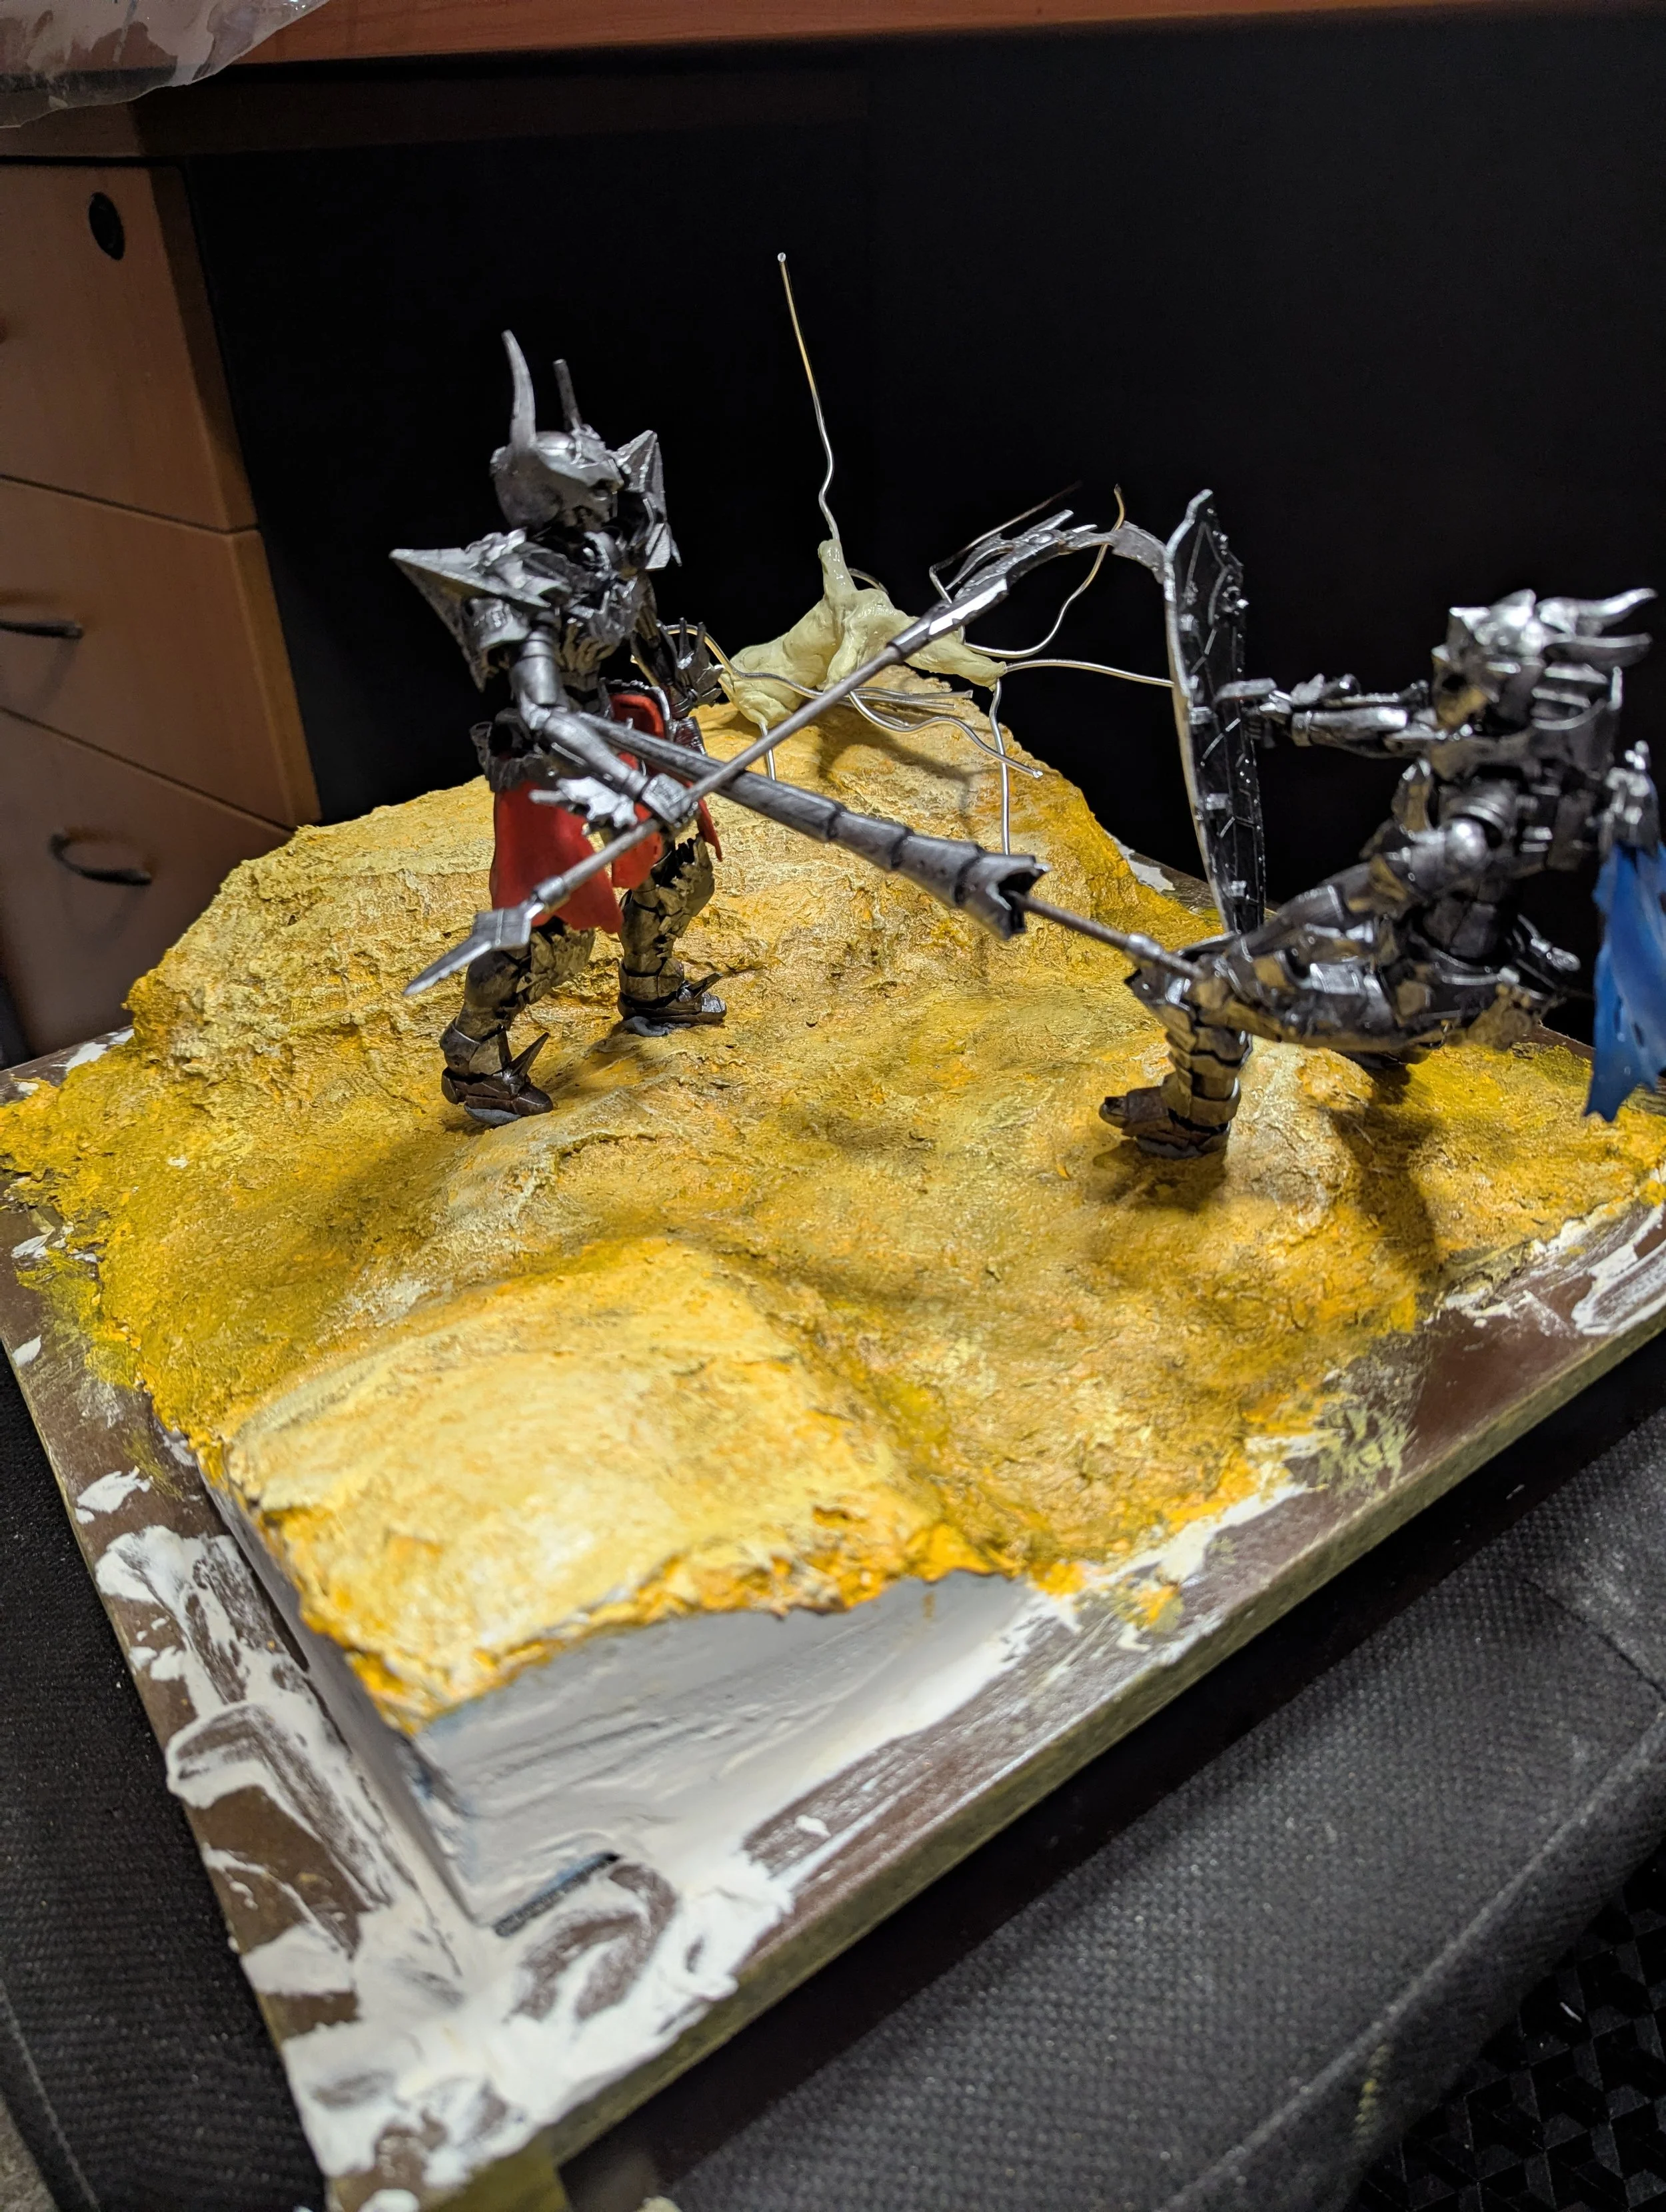
But once I placed it into the diorama, I changed my mind.
The tree made the background feel too busy and started drawing attention away from what I actually wanted people to look at, the battle between the Necrosknight and Rosan Lancer.
So, despite putting the time into building and painting it, I've decided not to use it.
It's always a little frustrating to leave something out after spending time on it, but I think it's the right decision for the composition. Sometimes removing something is just as important as adding something.
Is the Desert Too Empty?
The one thing I'm still unsure about is the desert itself.
At the moment, it feels a little empty, which is why I wanted the tree.
Part of me wants to add more to the ground, perhaps more debris, rocks or other details — but the competition deadline is now very close.
The difficult part of a competition build is knowing when to stop.
There is always something else that could be added, another detail that could be improved or another part that could be changed. But every addition also has the potential to make the scene more cluttered or take attention away from the main subject.
After deciding to remove the tree for exactly that reason, I'm hesitant to add something just for the sake of filling space.
For now, I'm going to concentrate on getting the final details finished and see how the scene looks once everything is properly together.
The Final Push
With the deadline only days away, the project is finally looking like a finished diorama rather than a collection of individual parts.
The shield is finished and battle-damaged.
The desert has been textured and painted.
I've experimented with making my own pigment powder from pastels, added layered cotton-wool dust clouds and even built a tree, only to decide that it was better left out.
There are still a few finishing touches to go, but the end is definitely in sight.
After all the changes, experiments and unexpected decisions throughout this project, it's been a really enjoyable build.
Now I just need to finish it.
Next week, I'll finally be able to show off the completed Necrosknight vs Rosan Lancer diorama and the finished result of the competition build.
On to the next.
And remember: Always Paint Your Way
Previous Posts
If you enjoyed this project, you might also like:
Mecha Competition Build – Part 3: From Battle-Damage to Battlefield - Part 3 painting finished
Mecha Competition Build – Part 2: When the Plan Changes- Part 2 of my Mecha comp diorama
My First Mecha Competition Begins – Building the Necrosknight - The start of my first mecha comp.
