
Painting Guel's Dilanza HG – A Simple Weathering Process
Part 2 of 2: This article continues my Guel's Dilanza HG project. If you'd like to see the build and why I chose to repaint the kit, start with Sometimes the Hobby Isn't About the Paint.
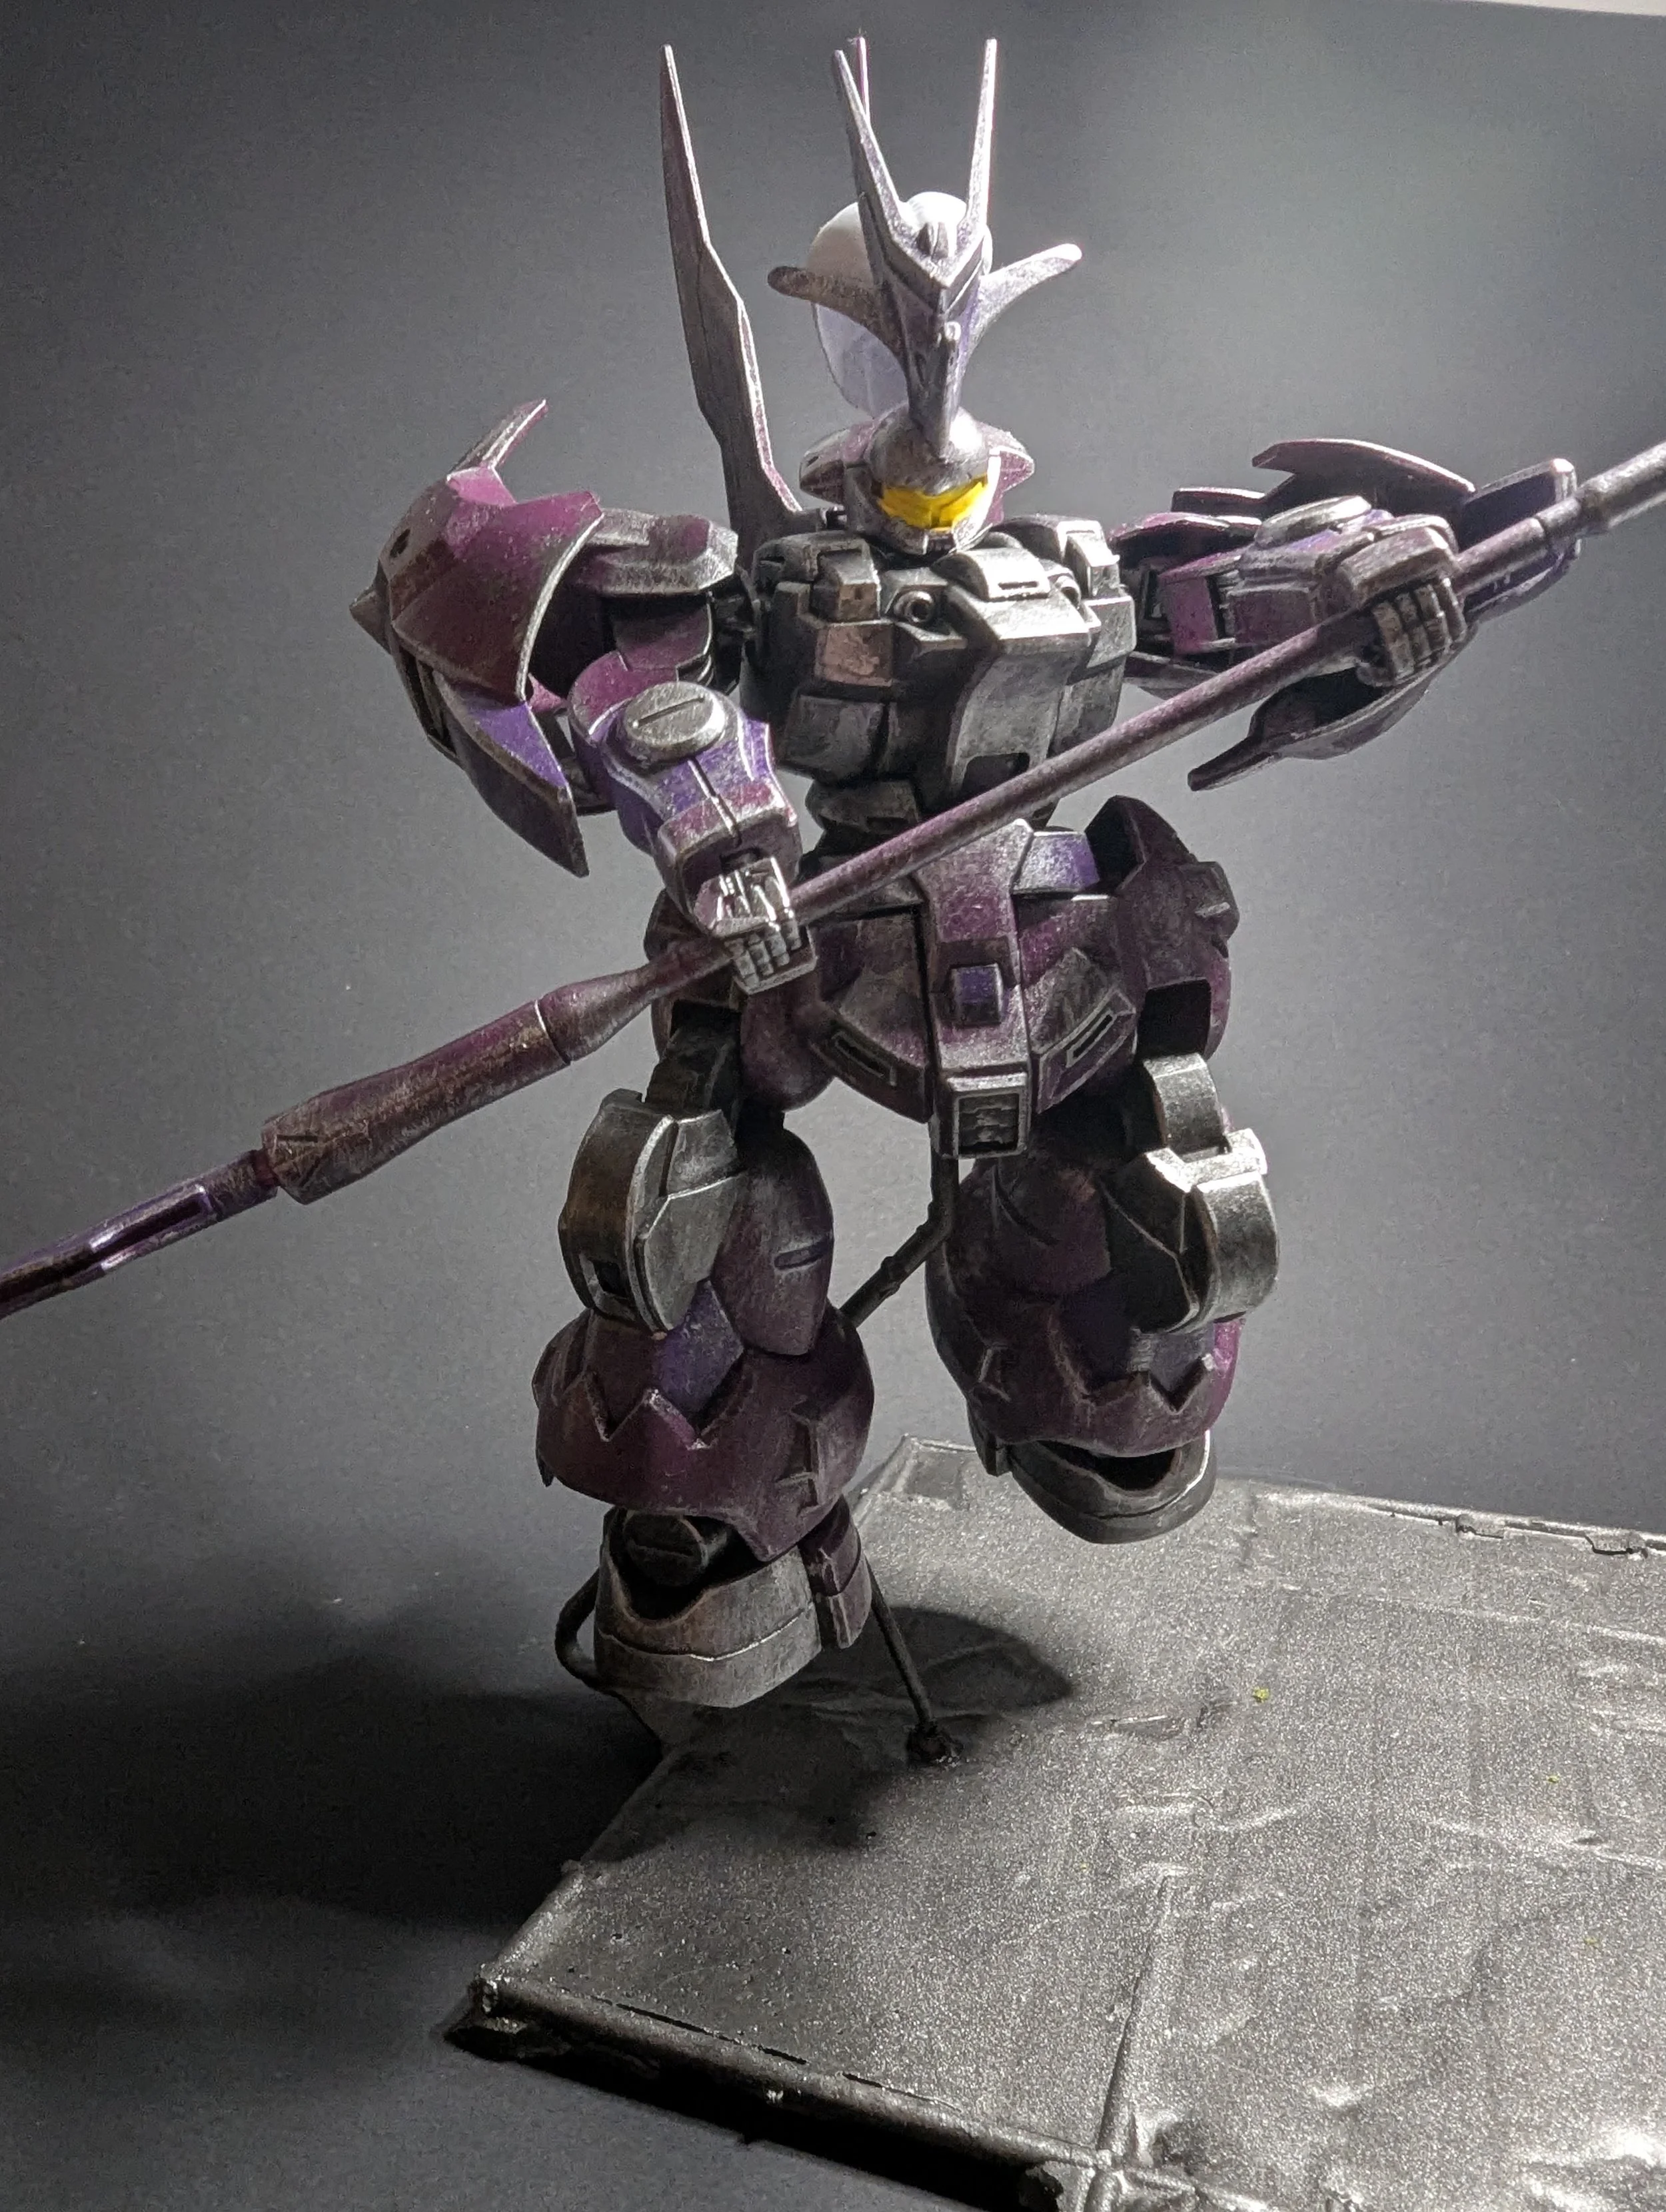
When I first built Guel's Dilanza HG, I knew I wanted to repaint it. The original colours looked good, but they didn't quite have the depth or character I was looking for. Rather than aiming for a clean, factory-fresh finish, I wanted to create a mobile suit that looked like it had seen plenty of combat while still being well maintained.
This isn't a competition-level paint job, and it doesn't rely on complicated techniques. Instead, it's a straightforward process that focuses on creating contrast, adding believable wear, and letting the weathering tell the story.
Don't Overthink the Base Coats
One of the biggest decisions I made was to keep the base coats simple.
I didn't spend hours making every layer perfectly smooth, and I didn't add any traditional highlights. Since I knew the model would receive several stages of severe wear, there wasn't much point chasing a flawless finish underneath.
Instead, I focused on getting solid coverage and making sure each panel was cleanly painted.
Sometimes "good enough" really is good enough. It's something I've written about before in When Good Enough Has to Be Finished, and this project was another reminder that not every layer has to be perfect if it's going to be covered by later stages.
Create Depth with Colour Variation
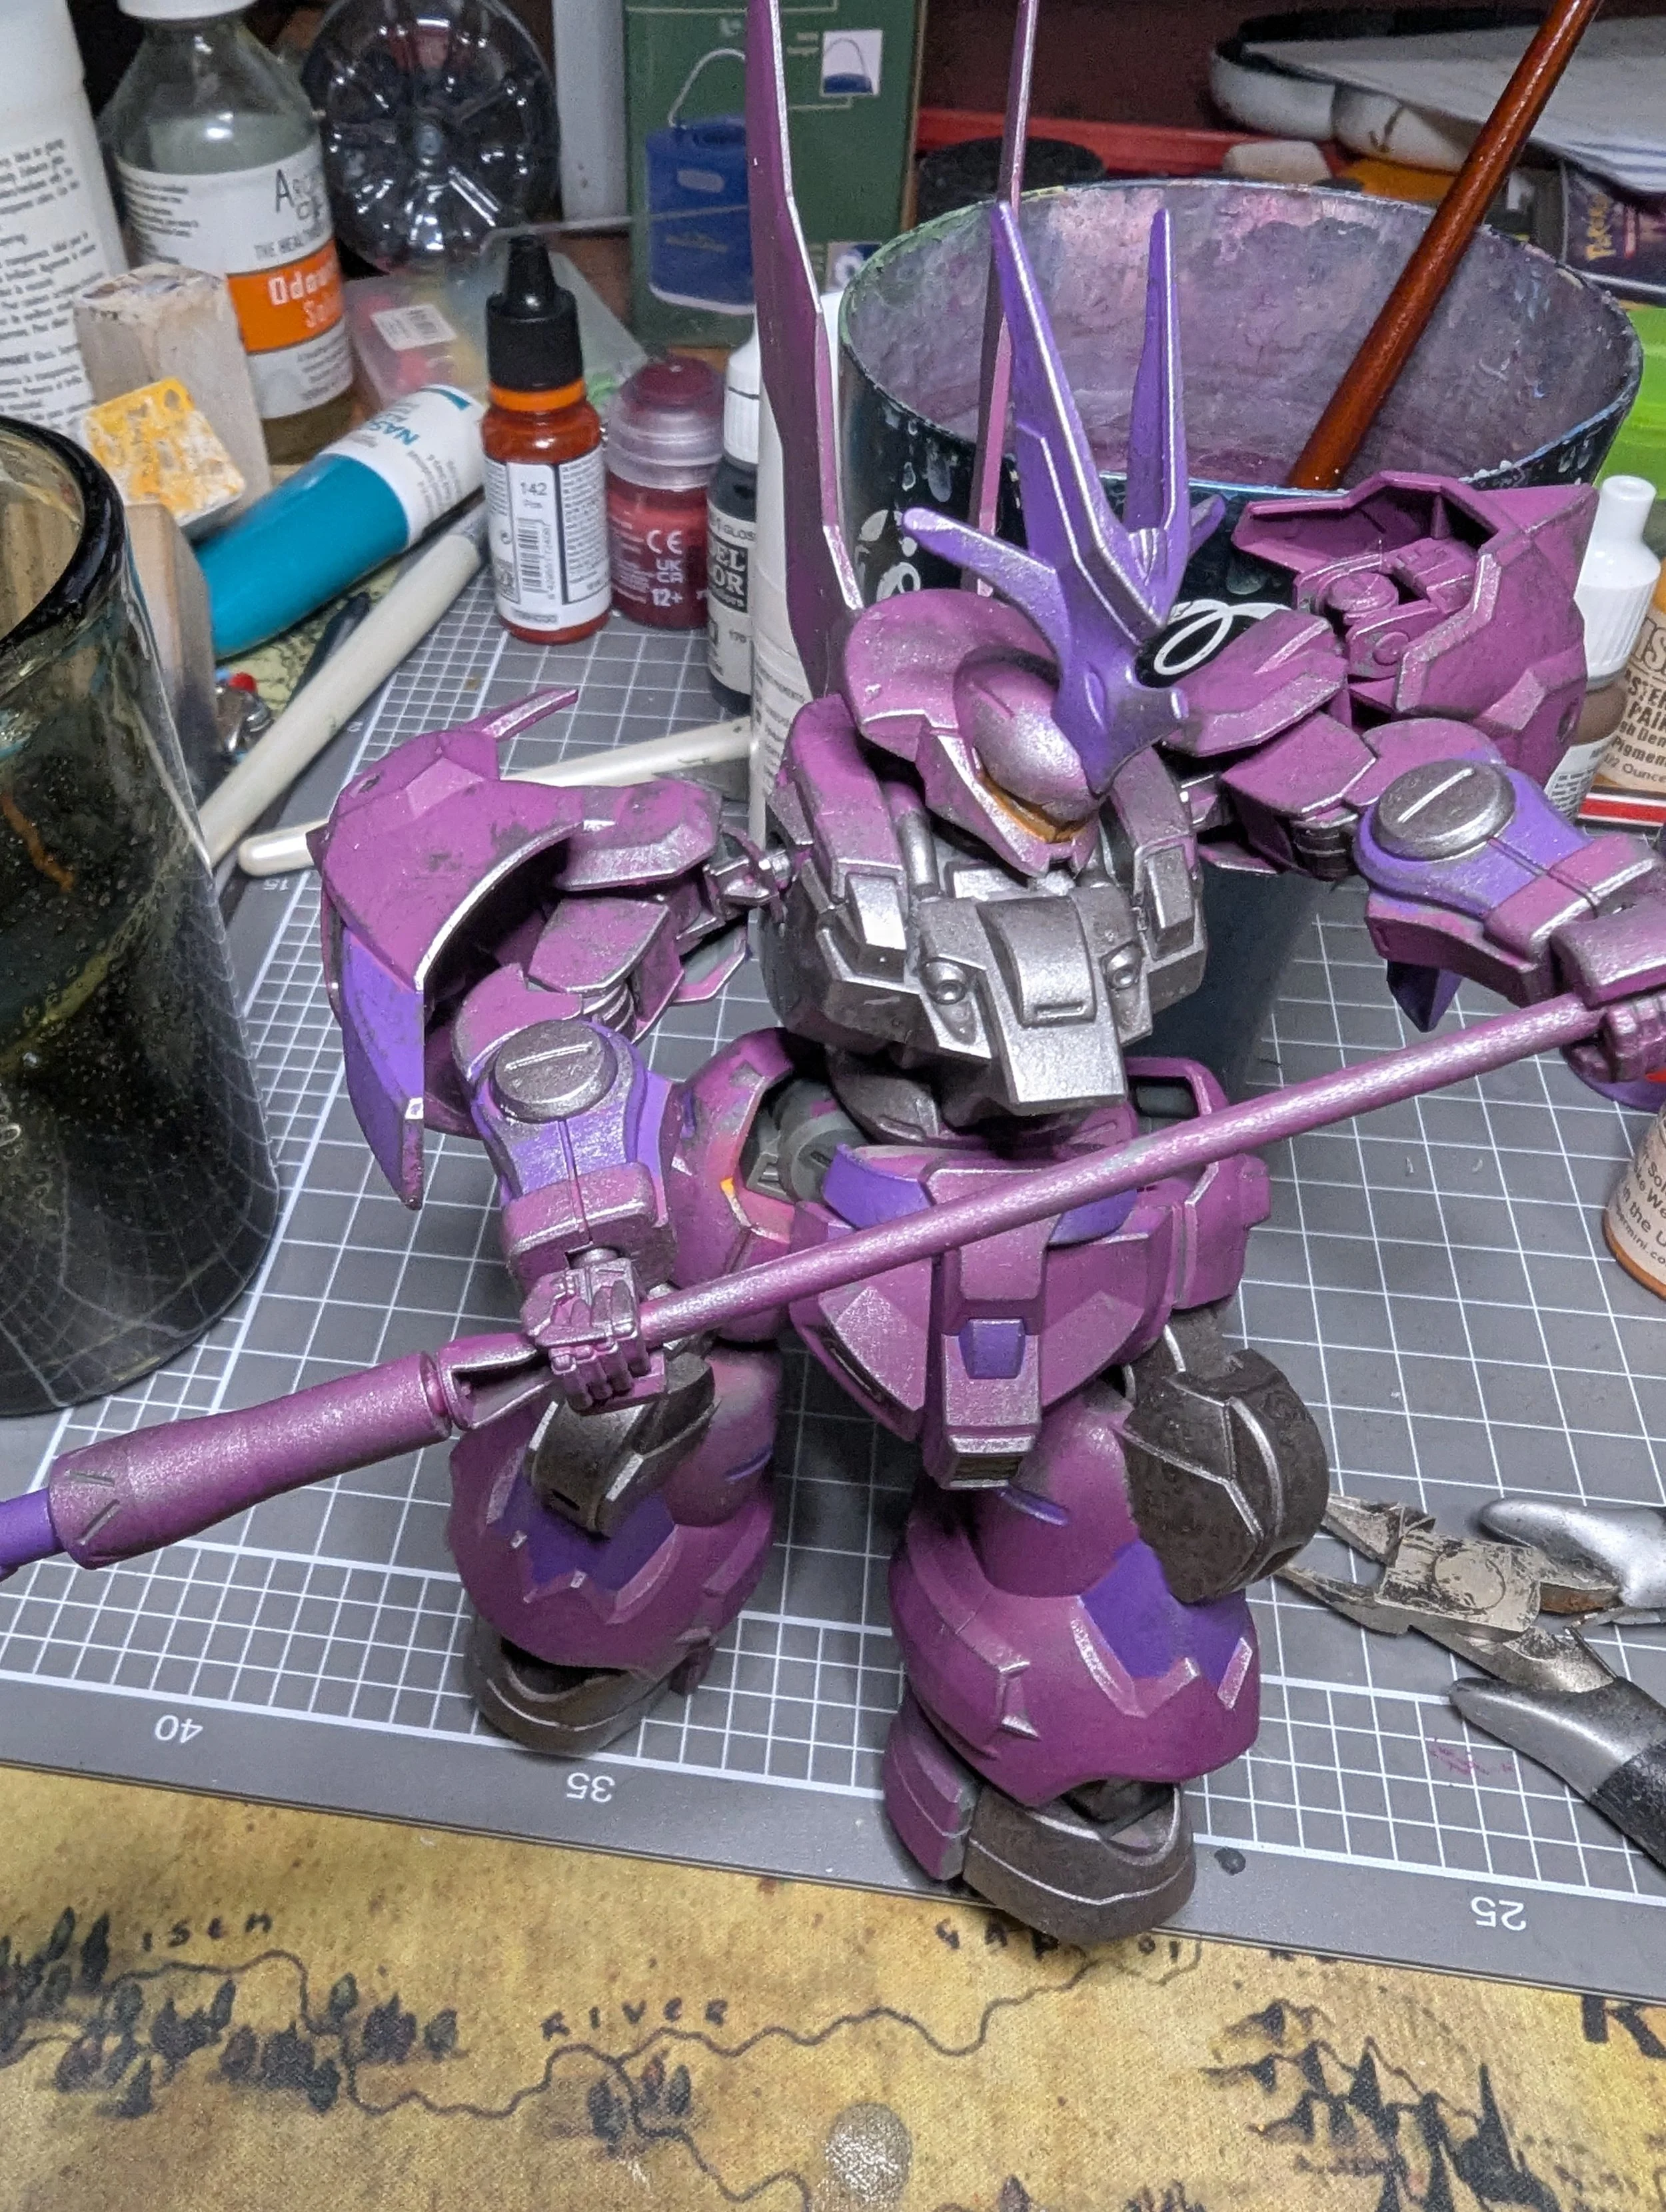
Rather than painting every armour panel the same shade as most of the original plastic, I used two different colours plus some metallics.
The majority of the armour was painted in VGC Deep Magenta, while selected panels were painted in the old VGC Hexed Lichen.
The contrast between the two colours isn't dramatic, but it's enough to stop the model from feeling like one large block of magenta. It gives the viewer’s eye somewhere to travel and helps define the shape of the armour without needing painted highlights.
This is a simple technique that can make a surprising difference on large models.
Add the First Layer of Battle Damage
Once the paint had cured, I began adding scratches.
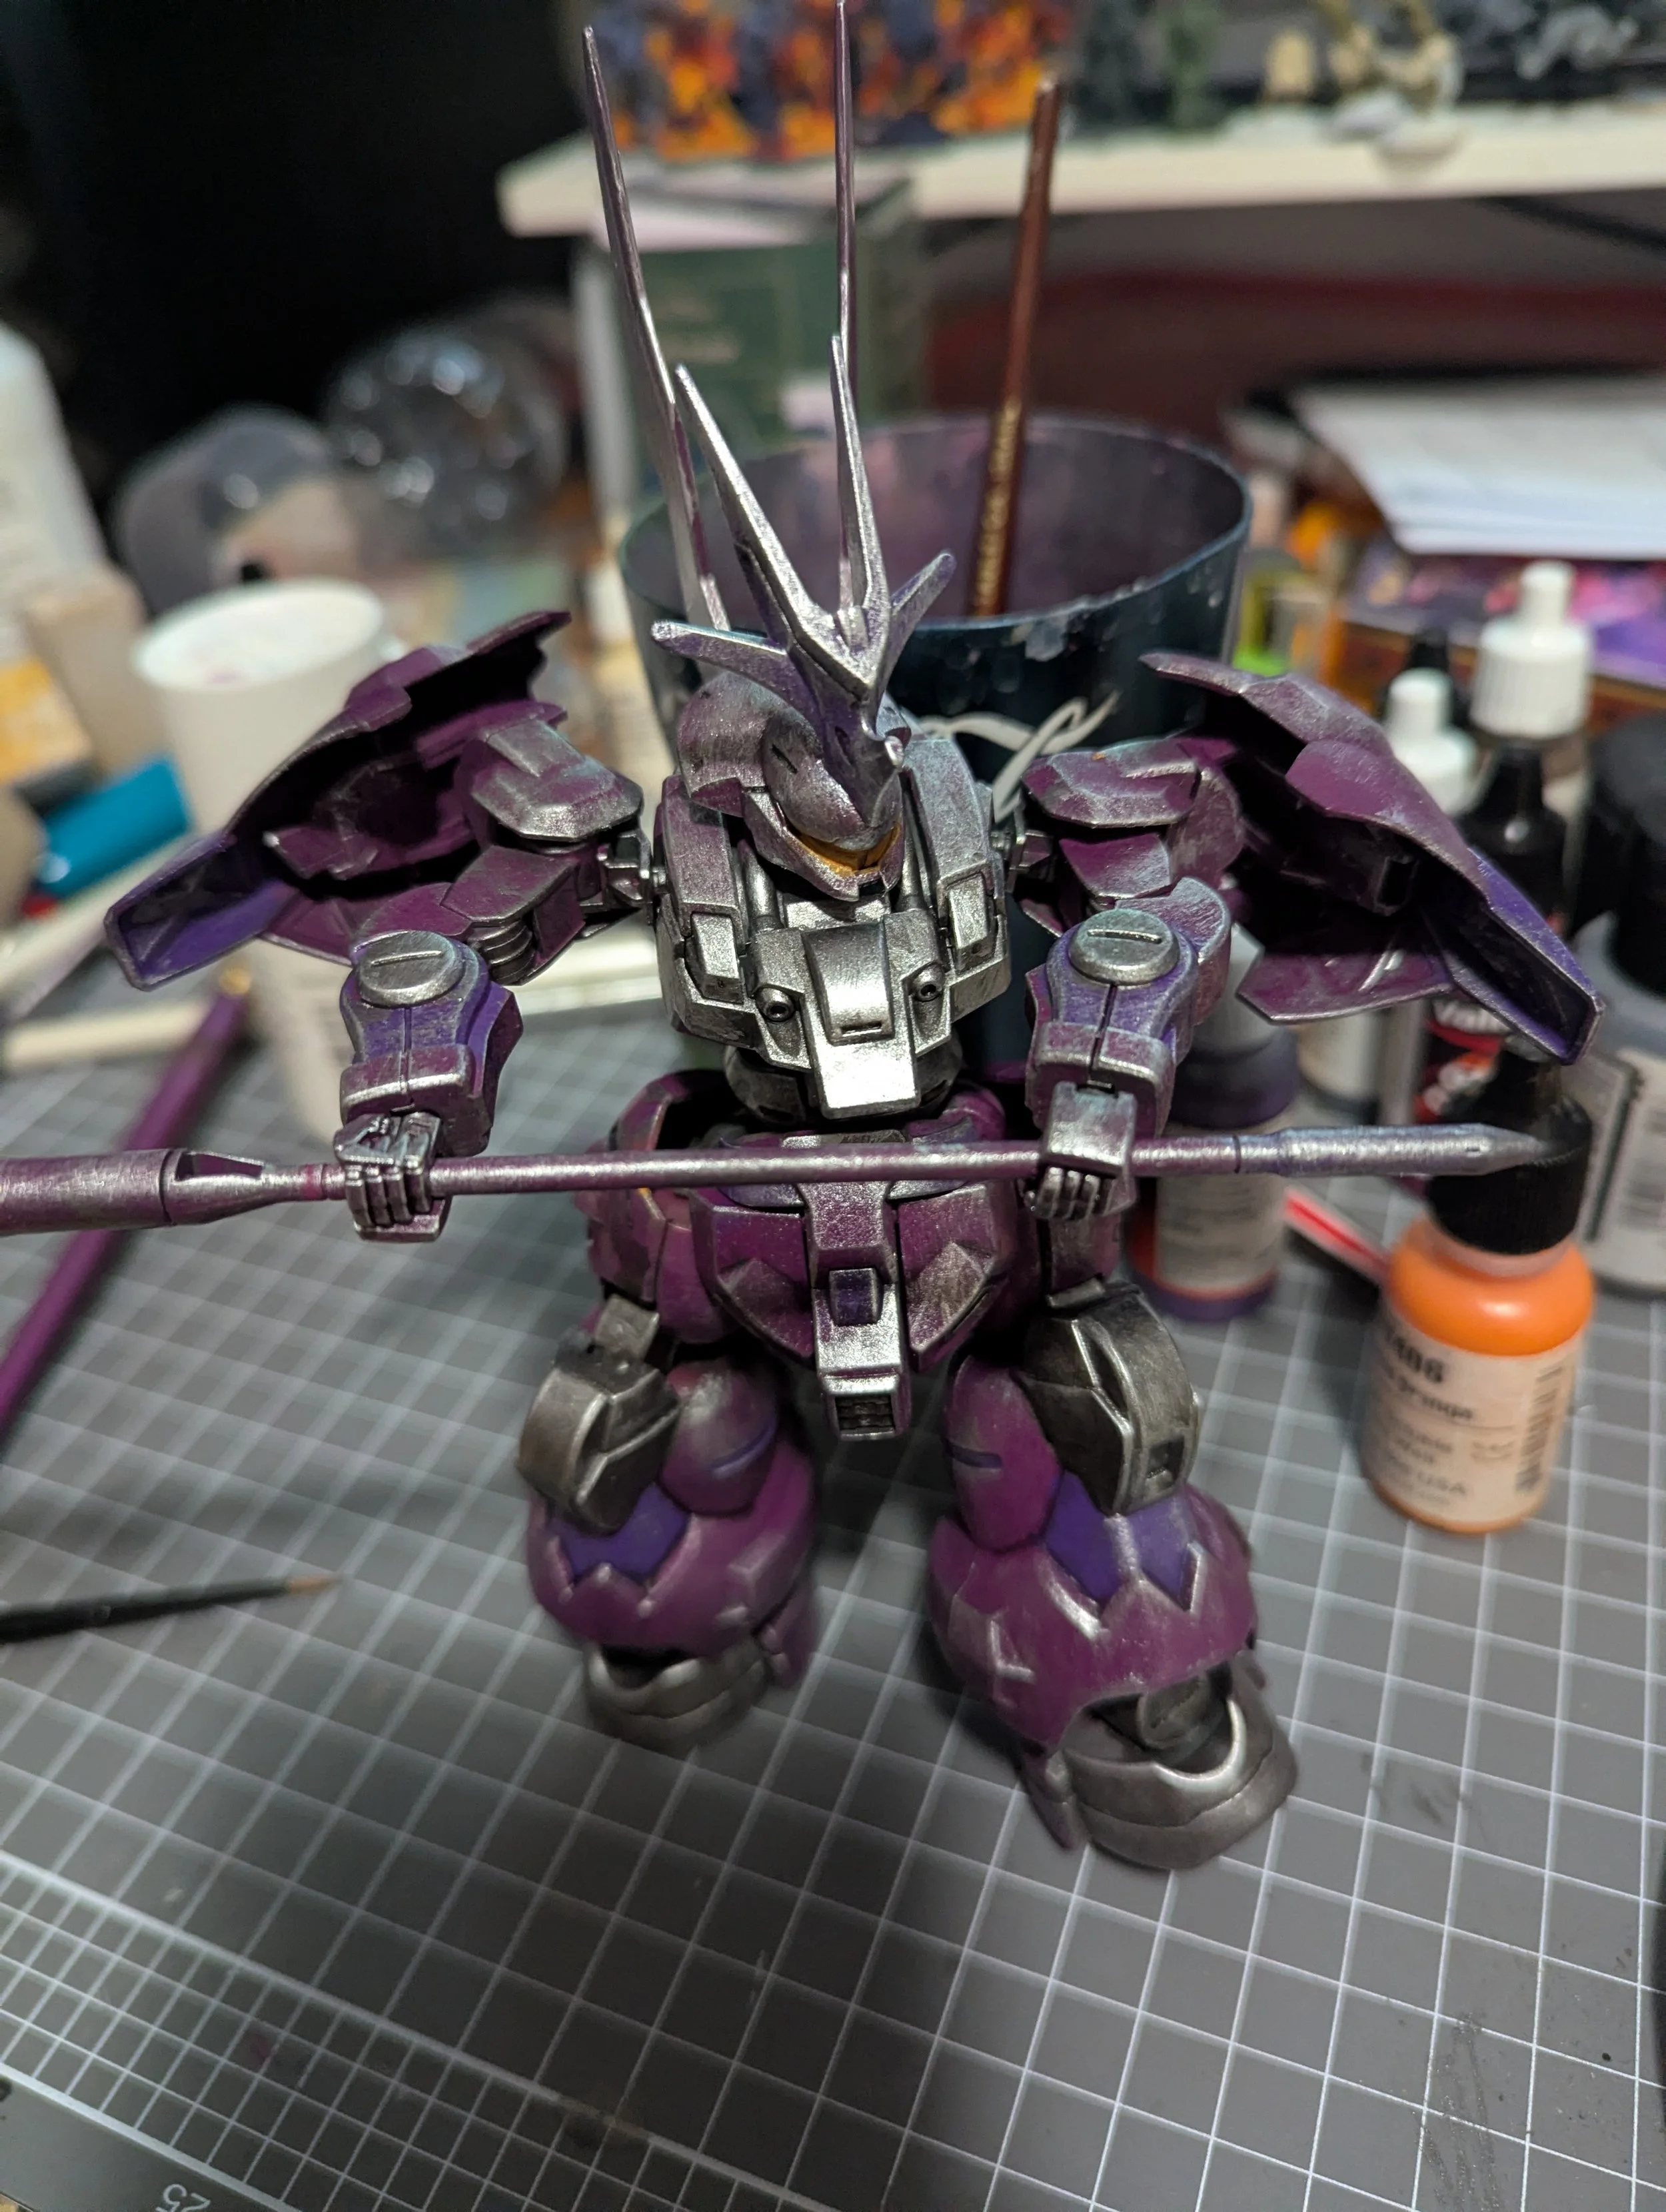
Using Vallejo Metal Color Burnt Iron and a dry brush, I lightly worked around the edges of the armour and areas that would naturally receive the most wear, depositing a darker metallic base to help create some depth to the wear.
The aim wasn't to make the suit look abandoned or rusting away. Instead, I wanted lots of fine scratches and wear marks that suggested heavy repeated use over time.
I then used a platinum from the Folk Art Treasure Gold range to create some lighter scratches, building the depth and showing the marks from new and old battles.
During this stage, it's worth stepping back every few brush strokes. It's very easy to keep adding scratches until you've gone too far; just take your time and build it up slowly.
Gloss Coat and Panel Lining
Before using panel liner, I applied a gloss coat across the entire model.
The smooth surface allows the panel liner to flow much more easily through the recessed details and makes cleaning up any excess much simpler.
Once the liner had dried, the armour immediately gained much more definition, helping separate each individual panel and making the mechanical details stand out.
Panel lining is never something that stands out on a model, but I find I notice when it is missing.
This is one of those stages where a relatively small amount of work makes a huge visual difference.
Fresh Wear
After sealing everything, I returned with another light metallic dry brush.
This second pass, I only used the platinum metallic paint and was focused on areas that would receive the most frequent contact during combat.
Layering the weathering like this helped create a little more depth rather than applying all of the scratches in a single stage, as the gloss coat creates a uniform look to the metalics.
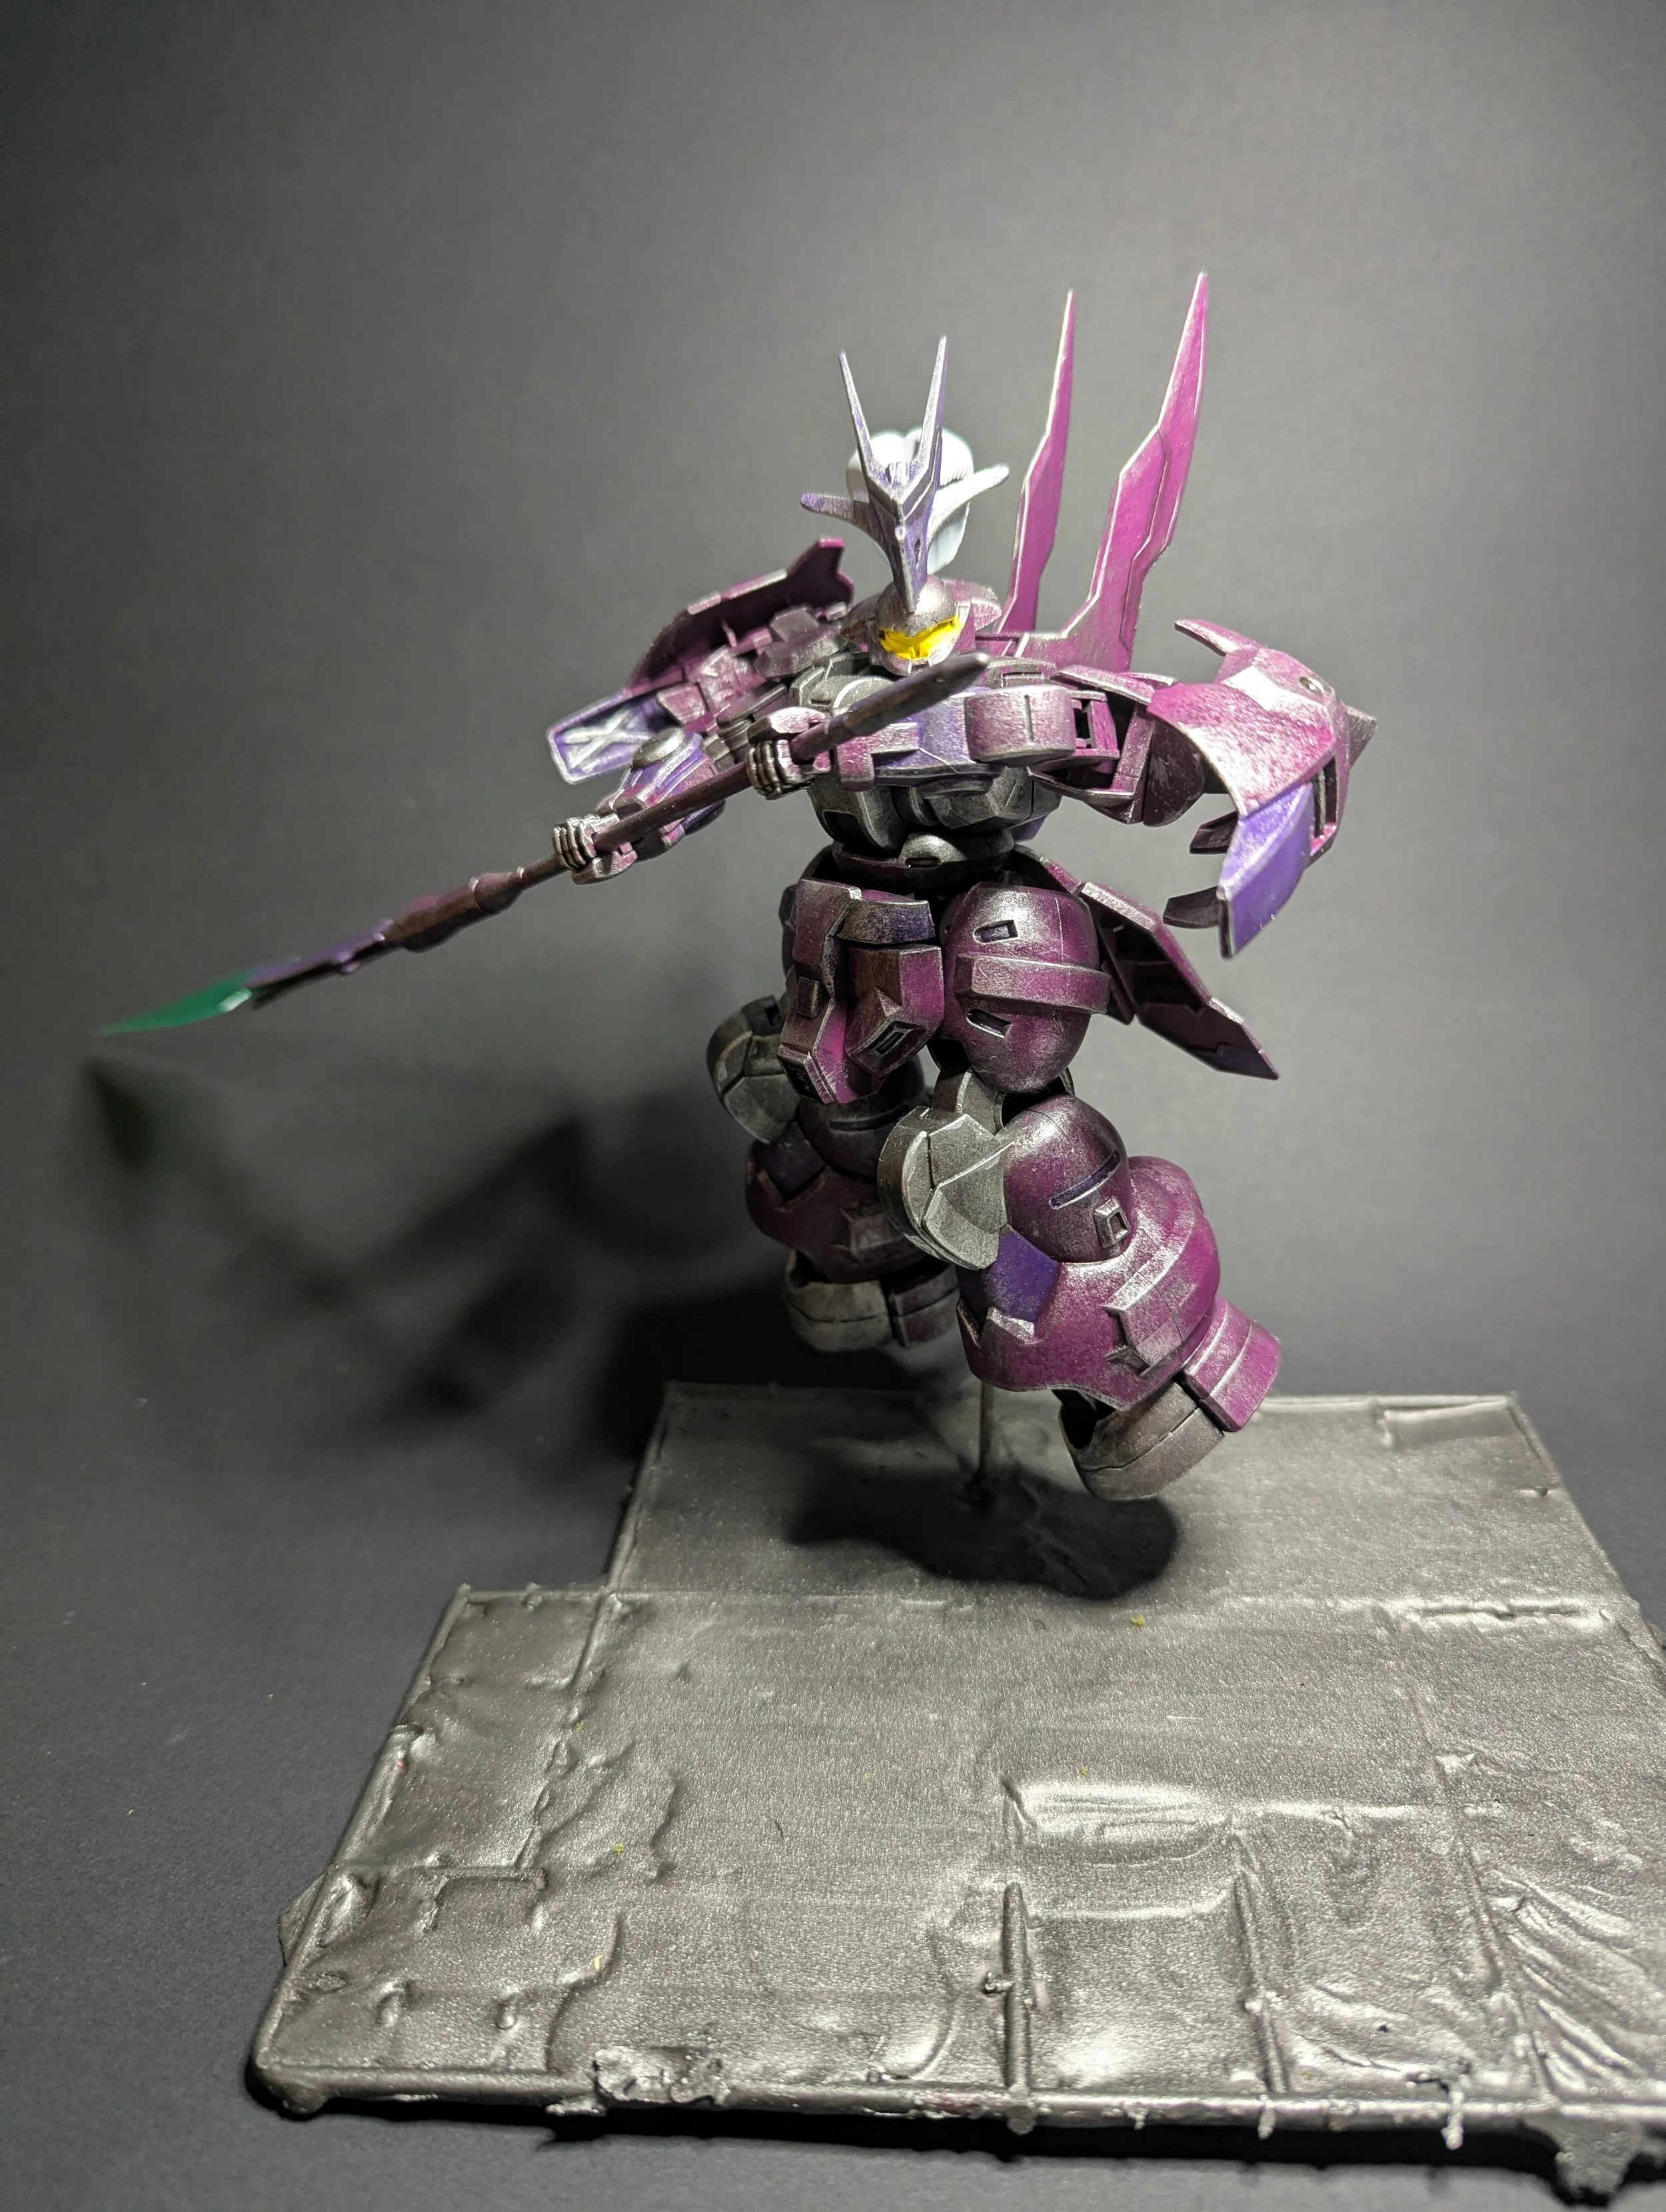
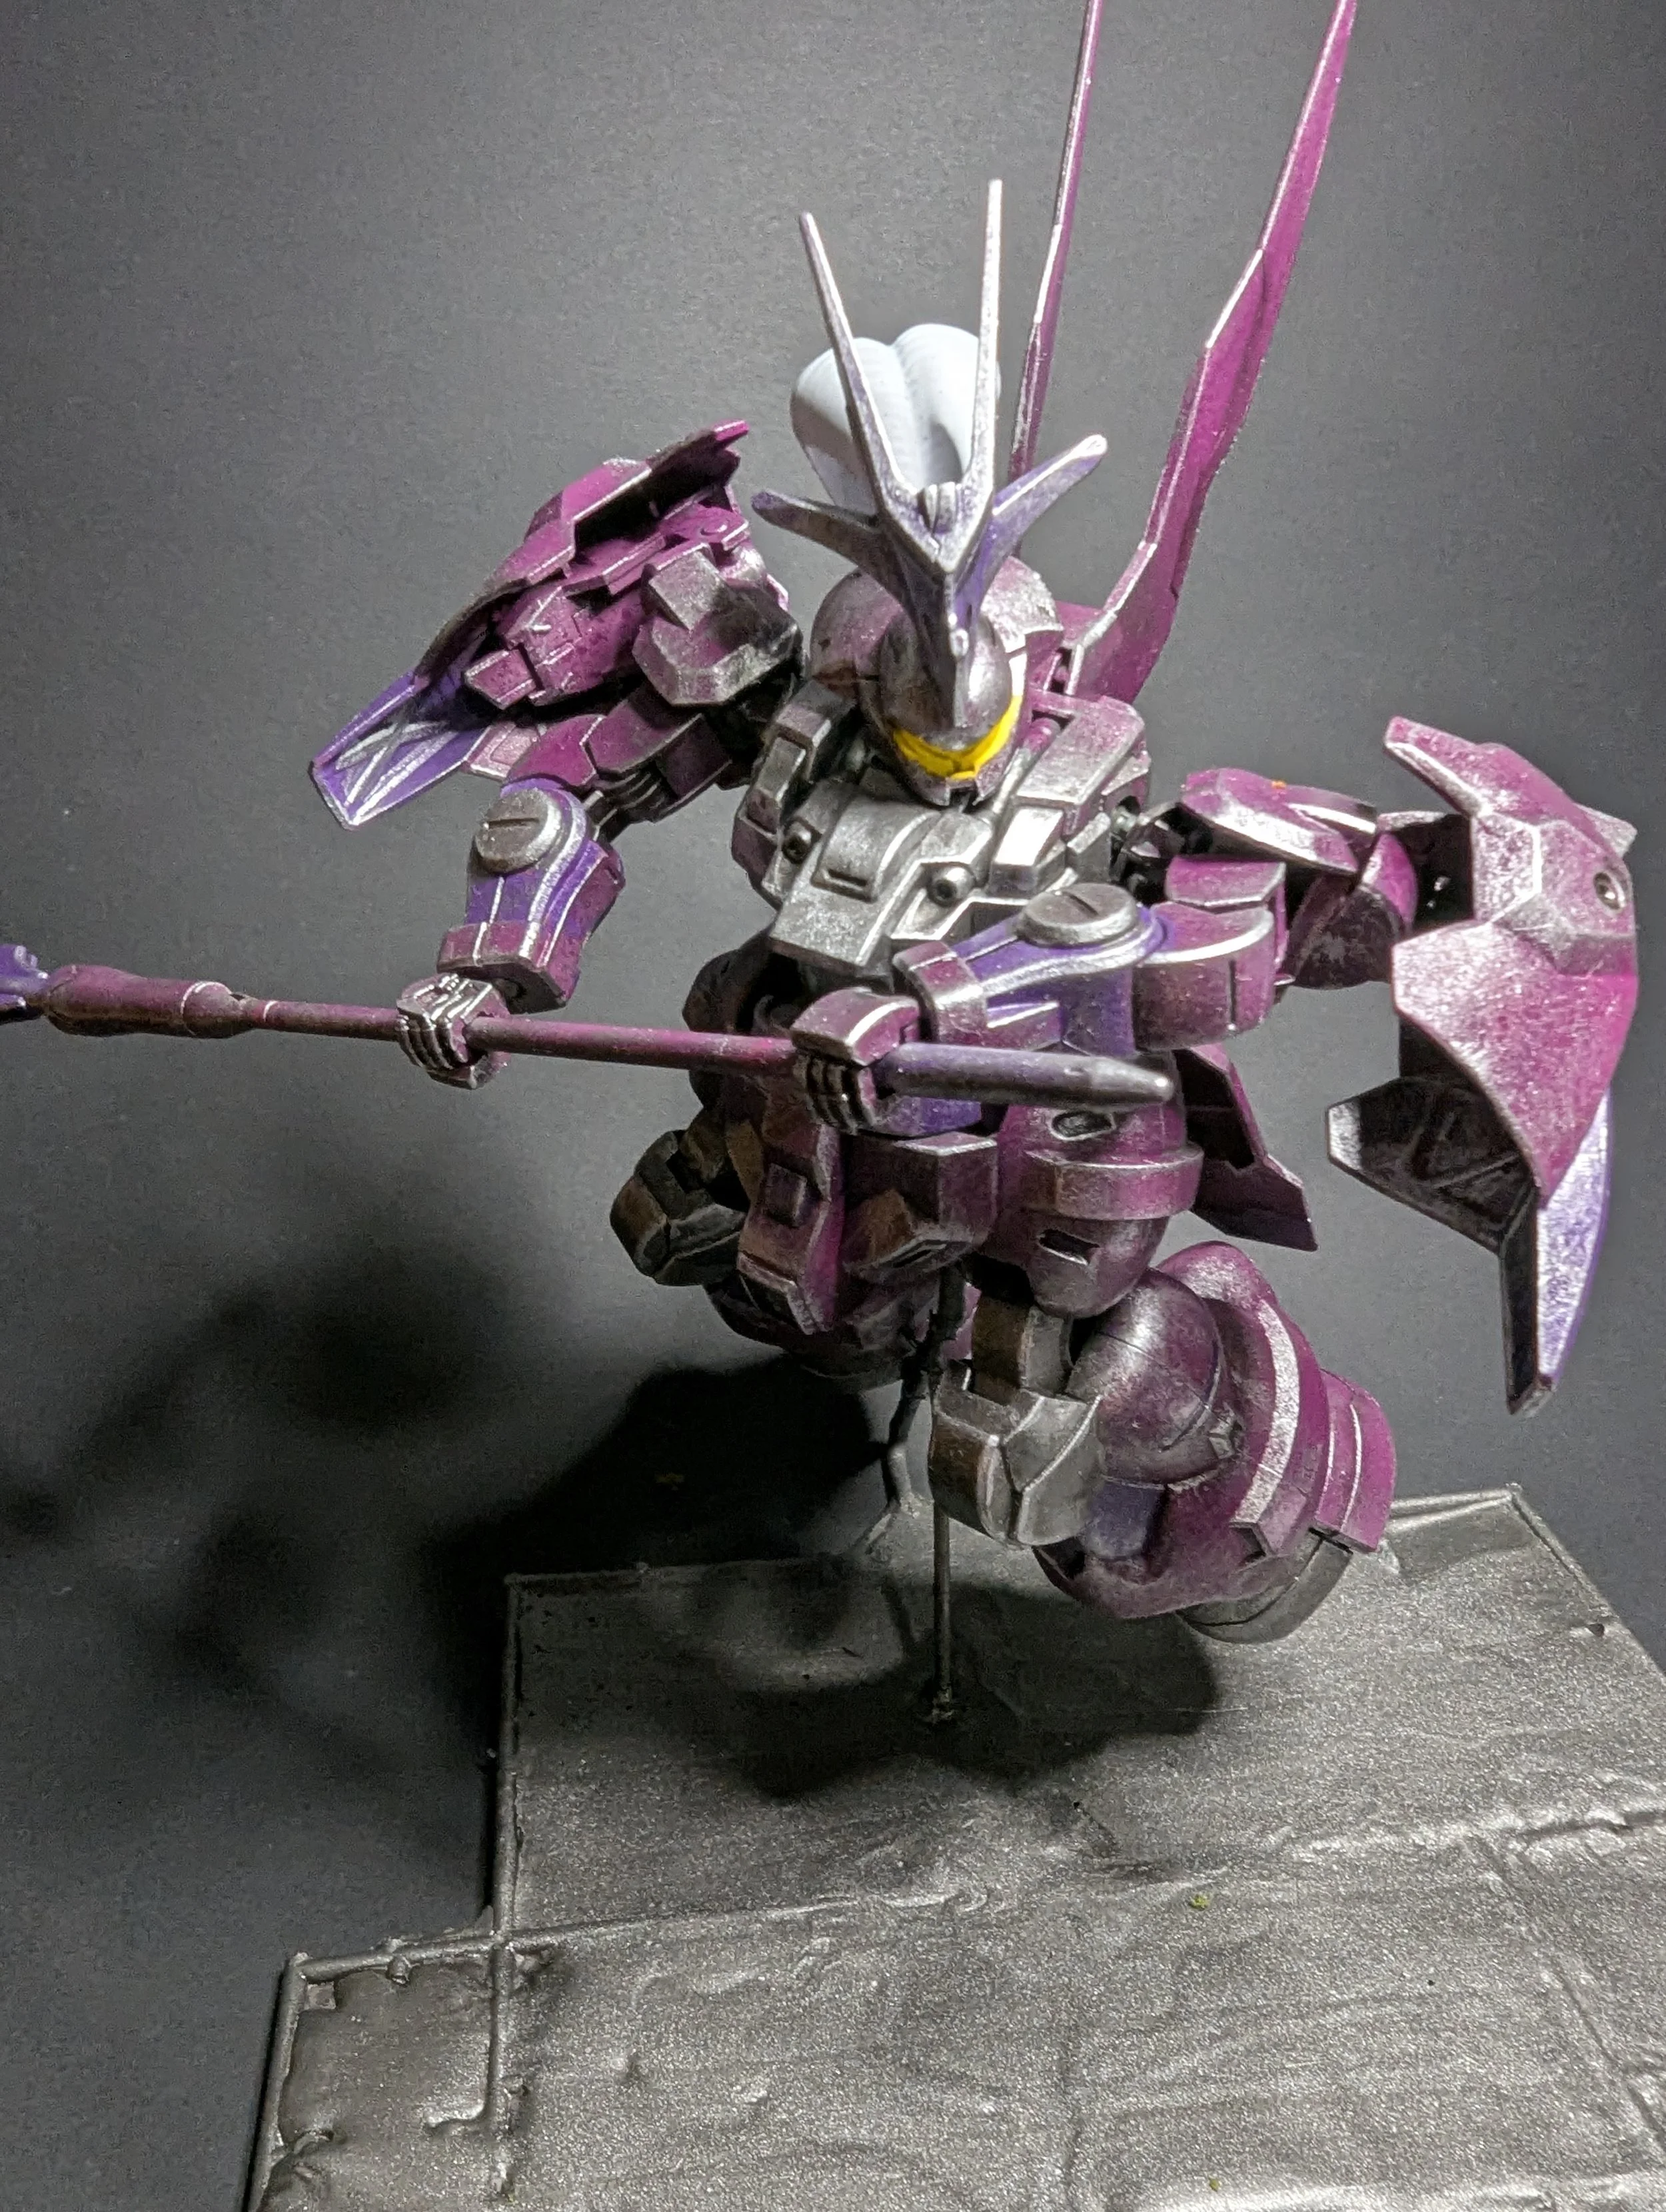
The result was exactly what I had imagined—a mobile suit that looks heavily used but carefully maintained.
Lots of fine scratches from flying through debris-filled space battles.
Not neglected.
Not rusty.
Just ready for another mission tomorrow.
Misplaced Pieces
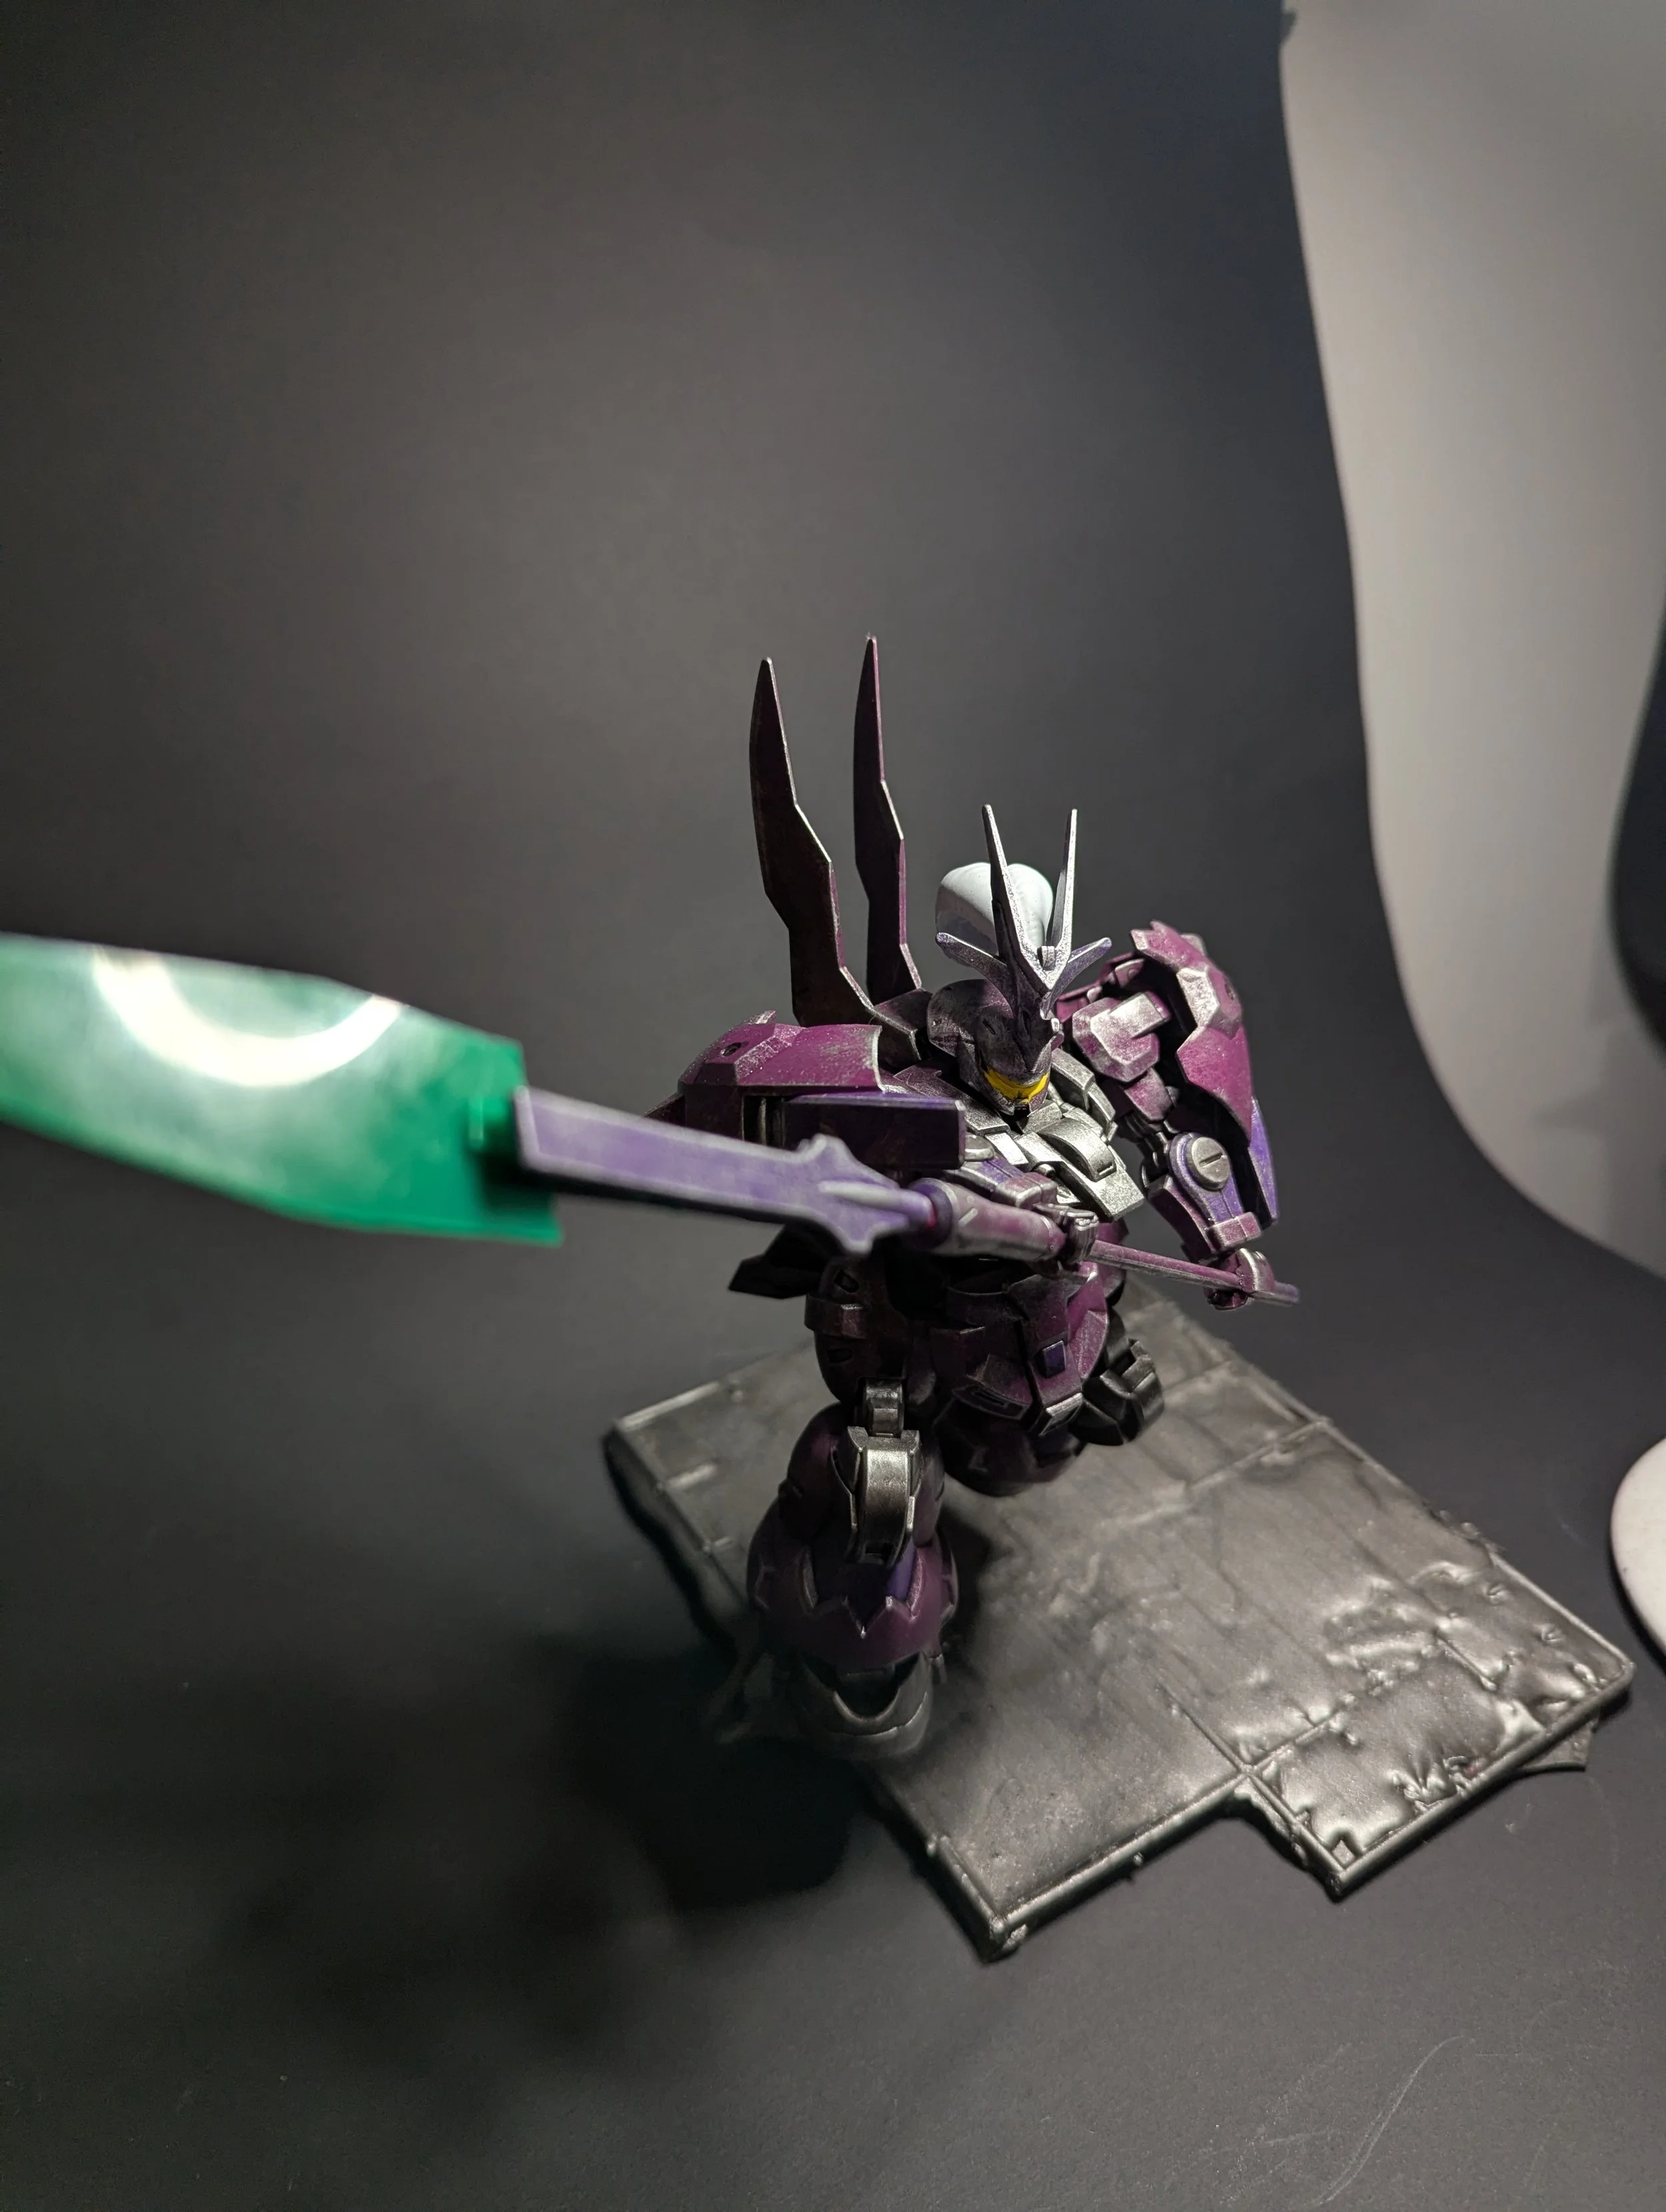
Now the miniature was painted and ready to go; unfortunately, somewhere during the project I managed to misplace the blade for the Dilanza's weapon and onsidering I'd already snapped the crest during the build, this Dilanza really seemed determined to keep me on my toes!
Rather than buying a replacement, I decided to see if I could have a go at making one make one myself.
I experimented with several different materials, including clear acrylic texture paste (which didn’t dry very clear) and painted clear plastic from a water bottle.
None of these turned out the way I wanted, and I spent the entirety of the next day thinking about what I could do. It was during my lunch that I saw the plastic lid on lunch box an noticed that the green translucent colour was perfect, and I couldn’t wait to get home ready to cut it to pieces.
My wife wasn’t too happy about it, but I think the look is as close as I can get, especially since all I had to do was cut a plastic lid.
The Finishing Touches
With the painting complete, there were still a few final details that I wanted to add before calling the project finished.
Rather than displaying the Dilanza standing on the shelf, I wanted it posed in flight and instead of buying a display stand, I challenged myself to build one from materials I already had.
Using an old piece of sprue, I cut it to the length I needed before carefully heating it over a small flame and bending it into shape. Once it had cooled, I carved the top of the support so it fitted neatly into the mounting hole on the Gundam.
During a few test fits I noticed the support arm had a little more flex than I was comfortable with, so I reinforced it by inserting a toothpick through the arm as an internal brace. It's a simple modification, but it made the stand feel much more secure.
Finally to improve both the strength and appearance of the stand, I filled the hollow sections of the sprue with UV resin before painting it to match the rest of the display.
Final Thoughts
This project reminded me that an effective paint job doesn't always need complex blending or hours of highlighting.
By keeping the base coats simple, introducing subtle colour variation, and using weathering to tell a story, I ended up with a model that has far more character than it did straight out of the box.
If you've never tried weathering a Gunpla kit before, I'd encourage you to give it a go. You don't need dozens of specialist products or advanced techniques—just a clear idea of the story you want your model to tell.
For me, that story was a mobile suit that's been fighting for days, cleaned and repaired each night, and ready to head back into battle the next morning.
On to the next.
And remember: always Paint Your Way
Further Reading
If you enjoyed this project, you might also like:
Sometimes the Hobby Isn't About the Paint – Building Guel's Dilanza HG from the box to primer.
Small Steps, Finished Models - Is 20 minutes enough time to progress the hobby?
Progress Doesn't Always Look Like Progress – where this experiment with shorter painting sessions began.
